3D Game Character
For this unit, I have decided to create a character in style of the Zelda games, more specifically the recent two, Breath of The Wild and Tears of The Kingdom. I wanted to lean into the desert area of the worlds, as I feel there is a lot of potential in them.
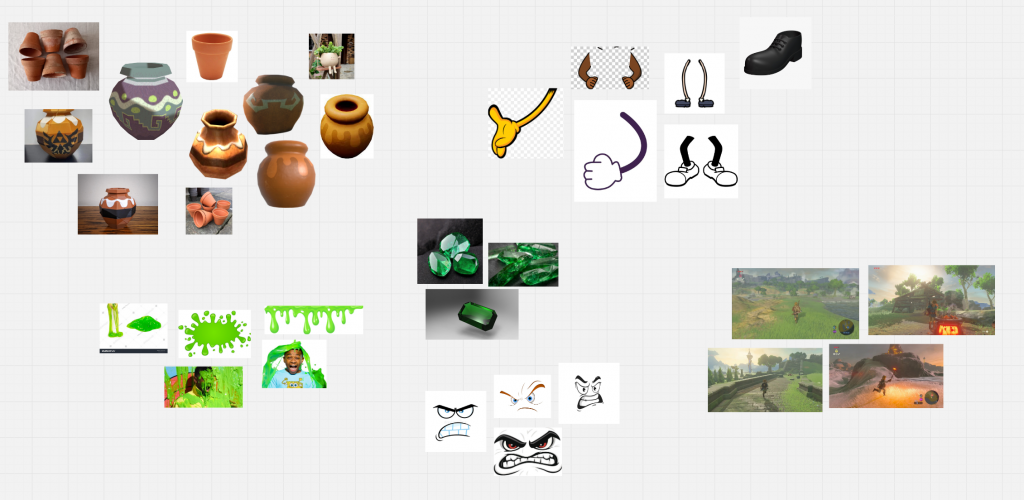
I originally had the idea to create a mimic. There are pots found all over the world with treasures inside, so there is a lot of potential for a pot-mimic enemy that tries to attack you once you hit it. However, since this is a body rigging unit and not a face rigging, I was advised to explore more ideas.
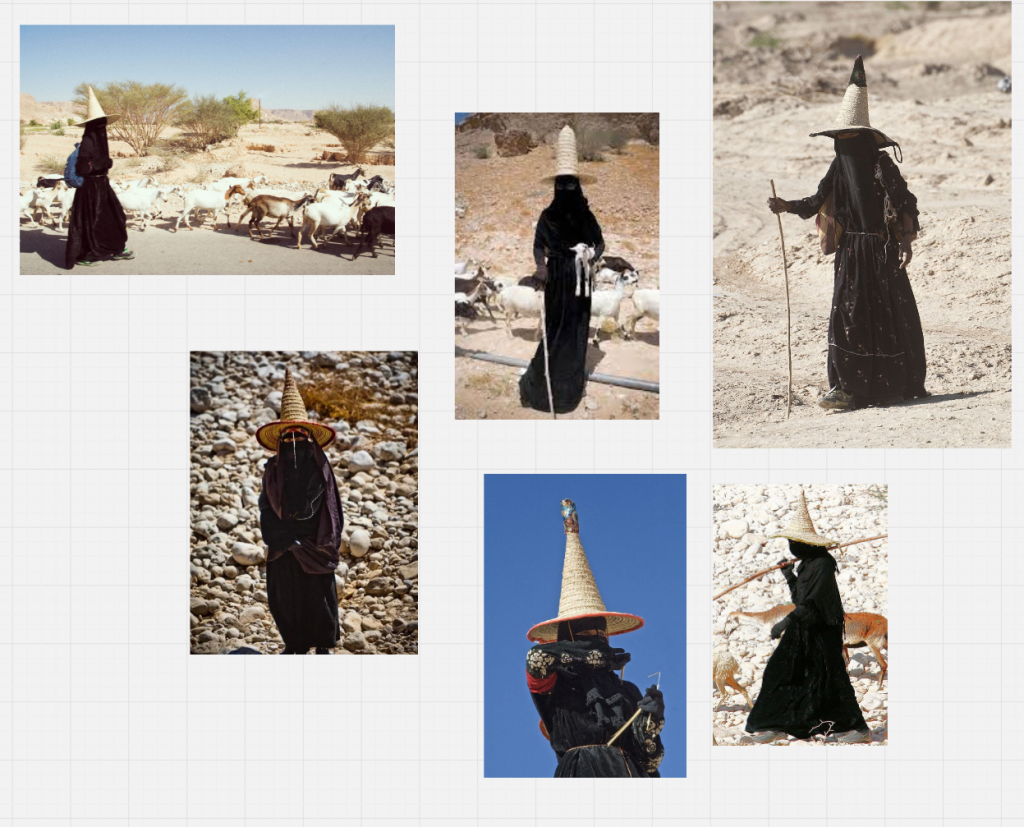
I looked up different desert residents in the real world, and came across these Yemeni shepherds, women from Hadhramout, who fully cover to protect their skin from the sun, and wear tall hats called madhallas to keep their heads cool with the cool air trapped inside circulating. I decided to take inspiration from them and create a desert traveller based on them. There are already desert villagers in the game, but they do not include real world aspects from people who live in the desert, such as long flowy robes, so I want to create a more true-to-fact character.

I created a mindmap describing the personality of the character and the main features I want to include.
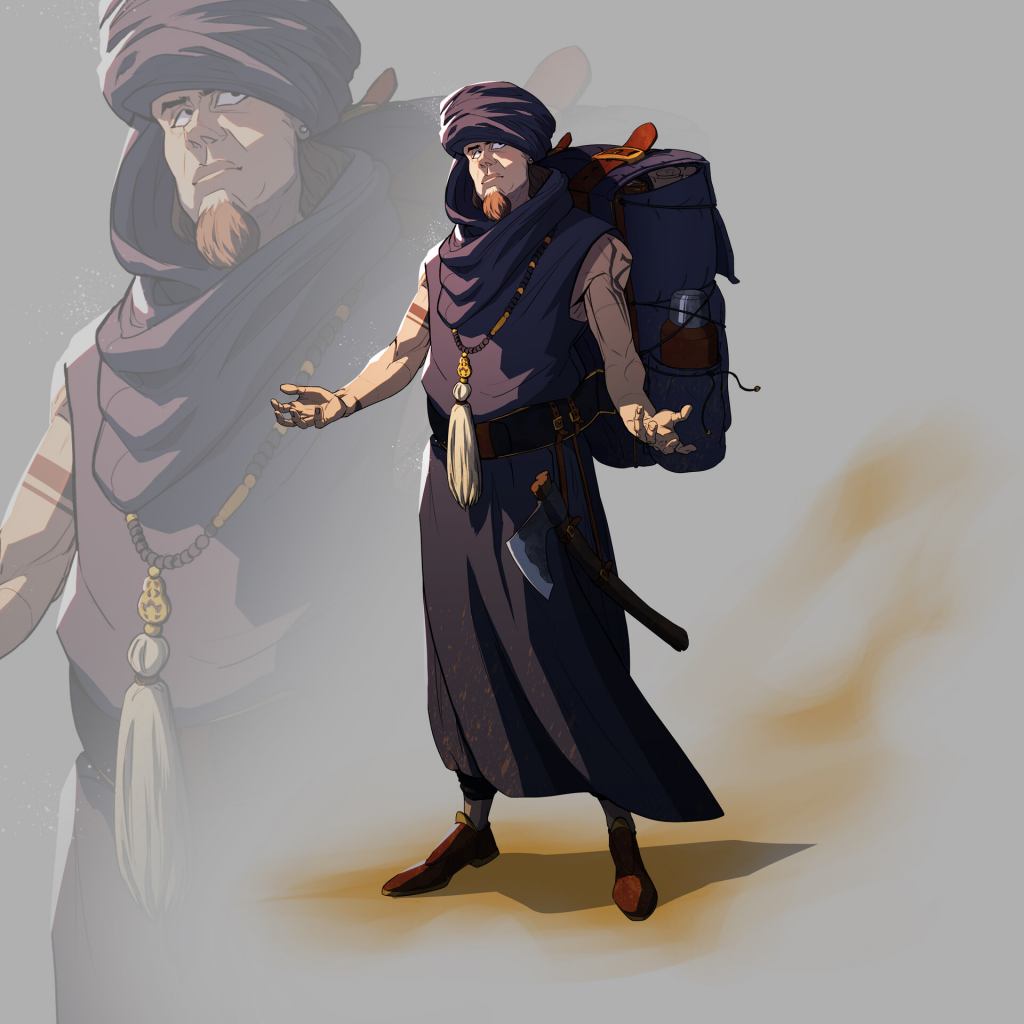
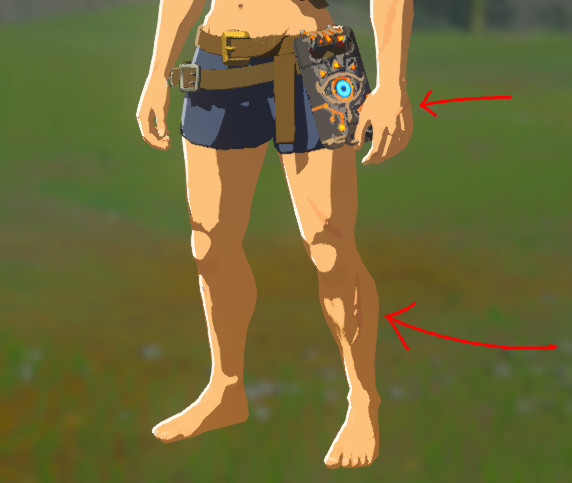
I tried to find a benchmark for my character, but this was the closest I could find. Even though it is 2D, it acts as a good reference for my character as well, including many things a real-world desert traveller would need.
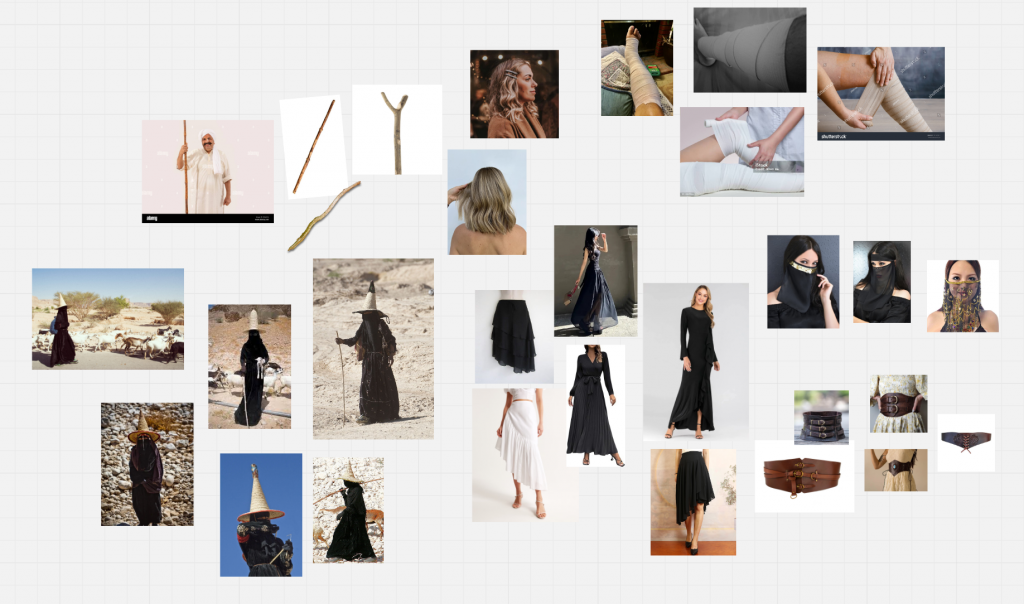
I created a moodboard filled with different parts of the character’s outfit and their features, such as having short to medium hair, and a face veil. I decided on her prop being a stick to act as a staff, but also a walking stick that helps her trek through the desert terrain.
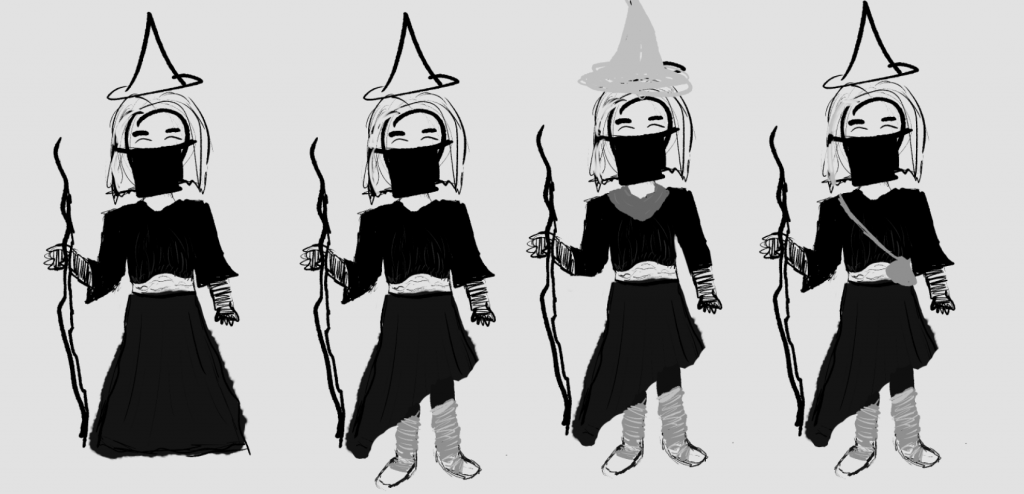
I started by creating an extremely rough sketch planning out my character and experimenting with different elements, such as her skirt length and her accessories.
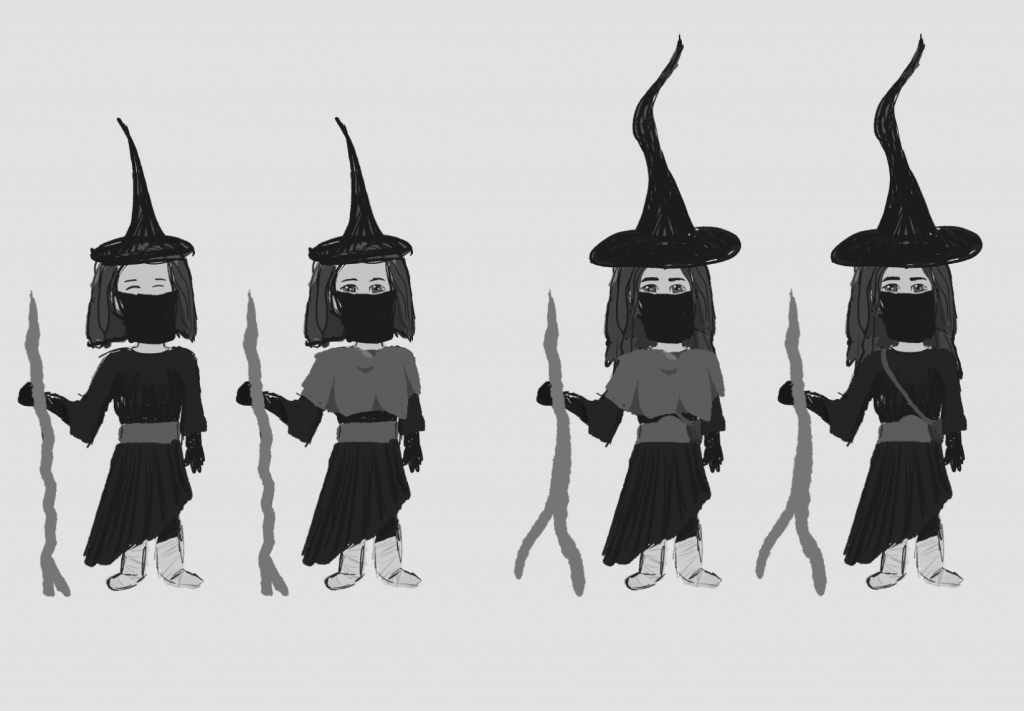
I started to define the features more, experimenting with her features still.
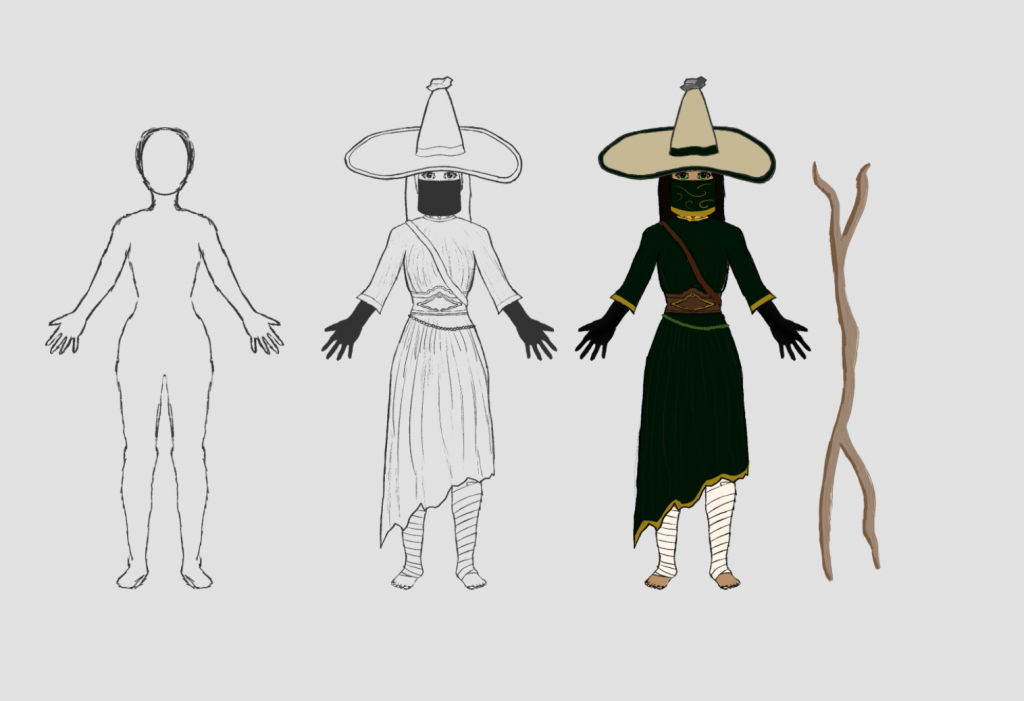
Eventually I developed enough to result in this sketch of my character with all the features I had intended. I made her hat more rounded to take away from the with silhouette, which in turn made it stay true to the madhalla shape.
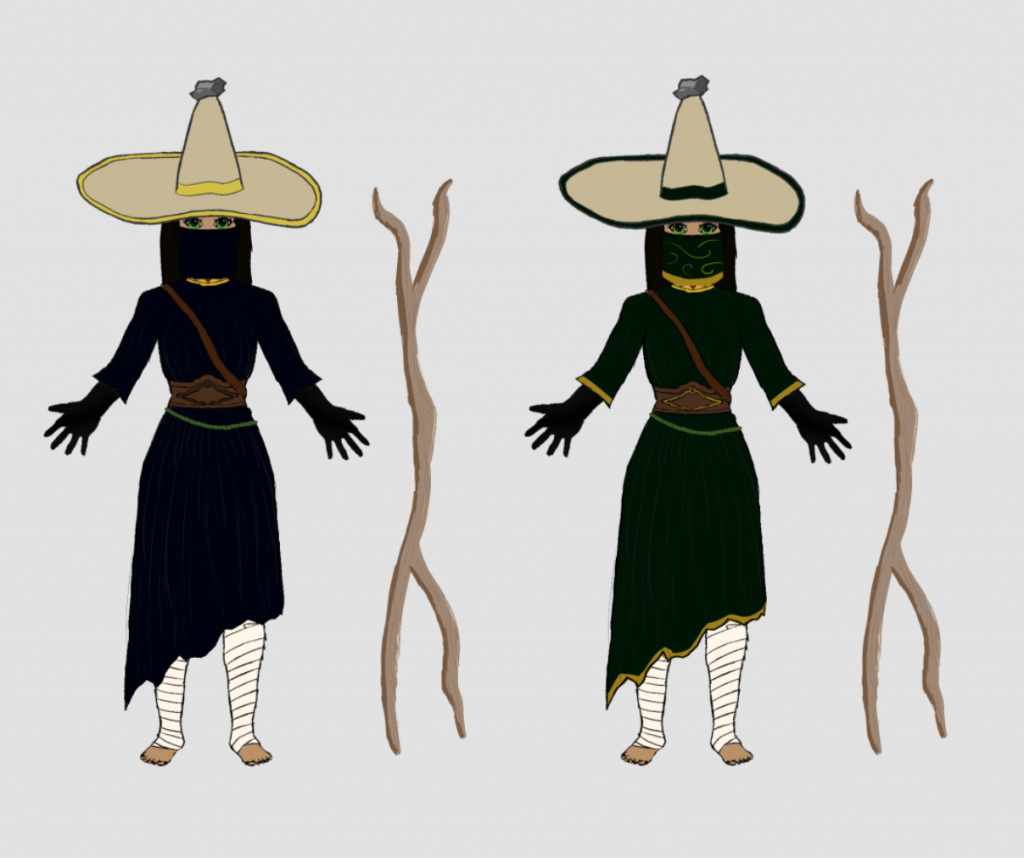
I tested out different colour schemes as well, but decided green was the most eye-catching one.
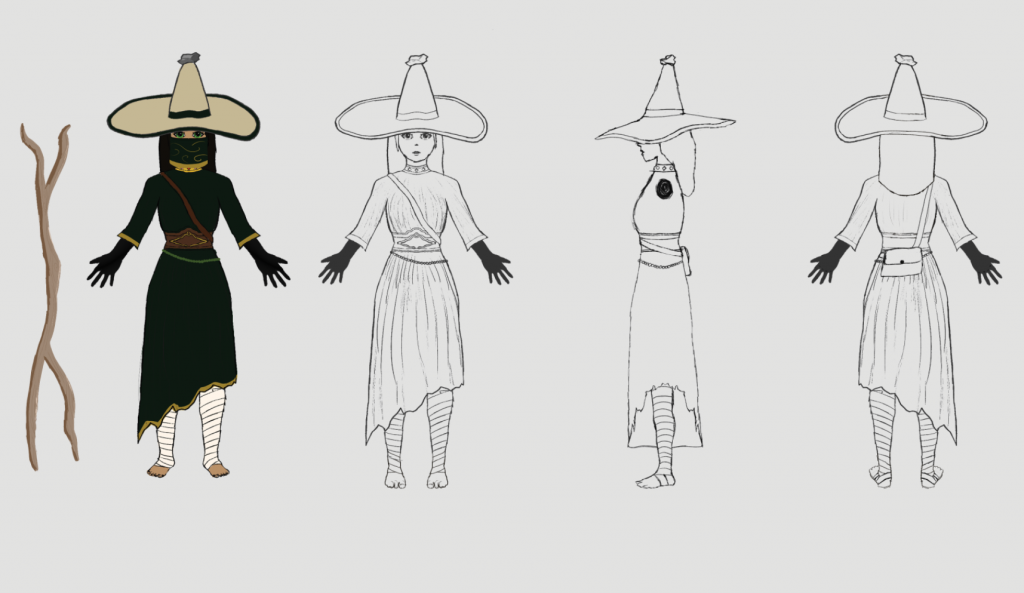
After finalising my sketch, I created orthographic views for it. I will be using these to help model my character.
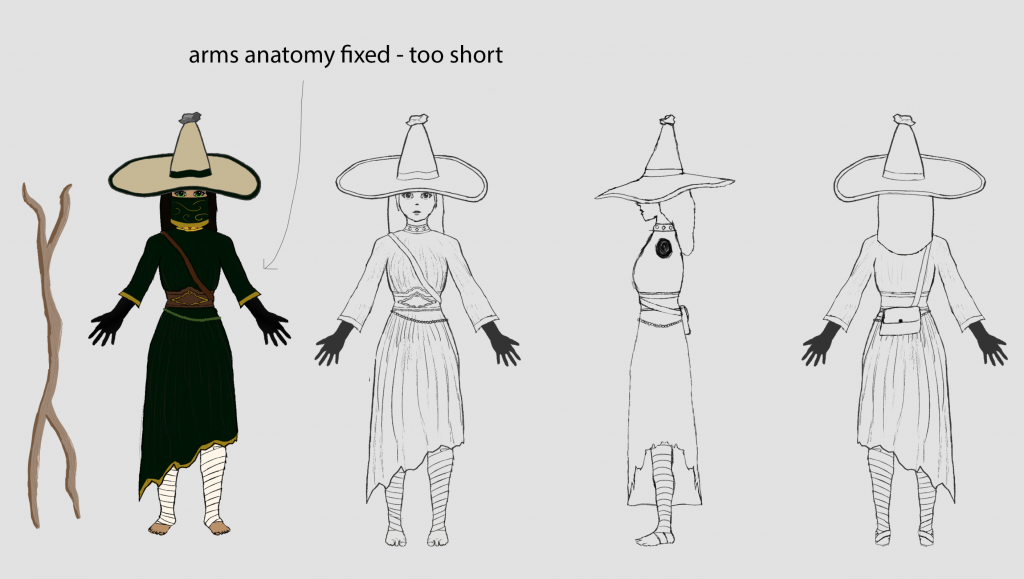
I asked for feedback from people and was told the arms were too short, so I extended them out slightly.
Isra was an inquisitive child, beaming of curiosity and exploration wanting to discover more about her homeland, the Gerudo desert. Growing up in a little cottage far from any other villages, Isra deeply desired to discover more about the desert, feeling a connection to it and understanding the mystery and history of the land. When Isra was old enough, she packed a small satchel, wore her best clothes, grabbed her herding stick and set off through the desert to explore and uncover the mysteries of the land. Now, she is adorned by trinkets and treats that she has found during her travel, such as a particularly mysterious rock that she keeps on top of her madhalla, and a golden necklace that was gifted to her by Lady Riju for her unwavering kindness and wisdom, while also balancing her firmness and protectiveness of her land. A young woman now, Isra continues to discover more about the land every day as she travels and offers help to anyone that may need it with her wisdom and knowledge of her homeland.
The style of The Legend of Zelda: Breath of the Wild (BOTW) is characterised by its cel-shading, a rendering technique that brings a cartoon style to 3D. The characters are very reminiscent of manga, with a toon-ish touch, making the world feel more fantastical and magical. The phrase ‘cel-shading’ originates from when animators would draw frames on celluloid sheets and then paint them (GarageFarm.NET, 2024). Cel-shading is defined by the simplistic lighting, flat shading and subtle textures. A popular example for cel-shading to achieve a manga/anime style in a game is Guilty Gear Xrd. The game strives to keep the distinct anime style of the characters in 3D and utilises cel-shading to do this. BOTW has more of a mystical element to its style, which I hope to achieve by learning cel-shading and how to use the arnold toon shaders.
Guilty Gear Xrd. 2014. PC [Game]. Arc System Works: Yokohama, Japan
GarageFarm.NET (2024) Cel shading: A comprehensive guide, GarageFarm.NET. Available at: https://garagefarm.net/blog/cel-shading-a-comprehensive-guide (Accessed: 24 February 2025).
I will be using the toon shading renderer in Maya to achieve the cel-shaded effect of Zelda BOTW.
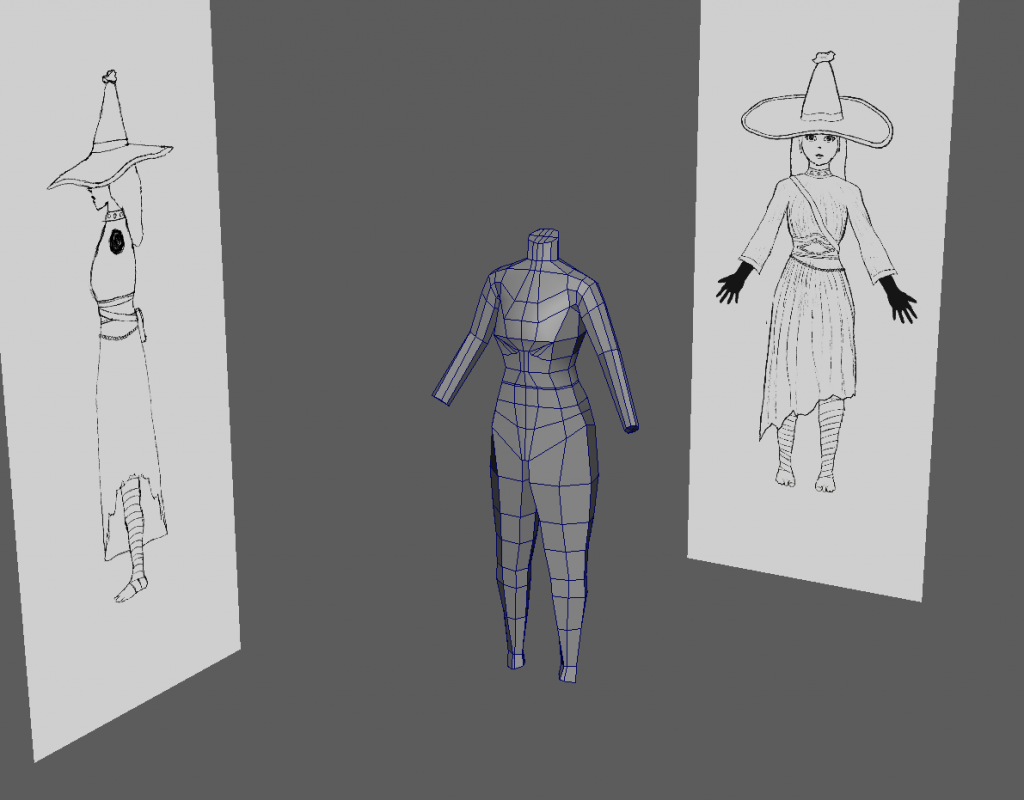
I began with a cube and created subdivisions. Then, using symmetry, I extruded and moved different faces, widening them and extruding outwards following the orthographic to create this rough blockout. I made sure to keep a single line in the exact middle to mark the symmetry of the blockout.
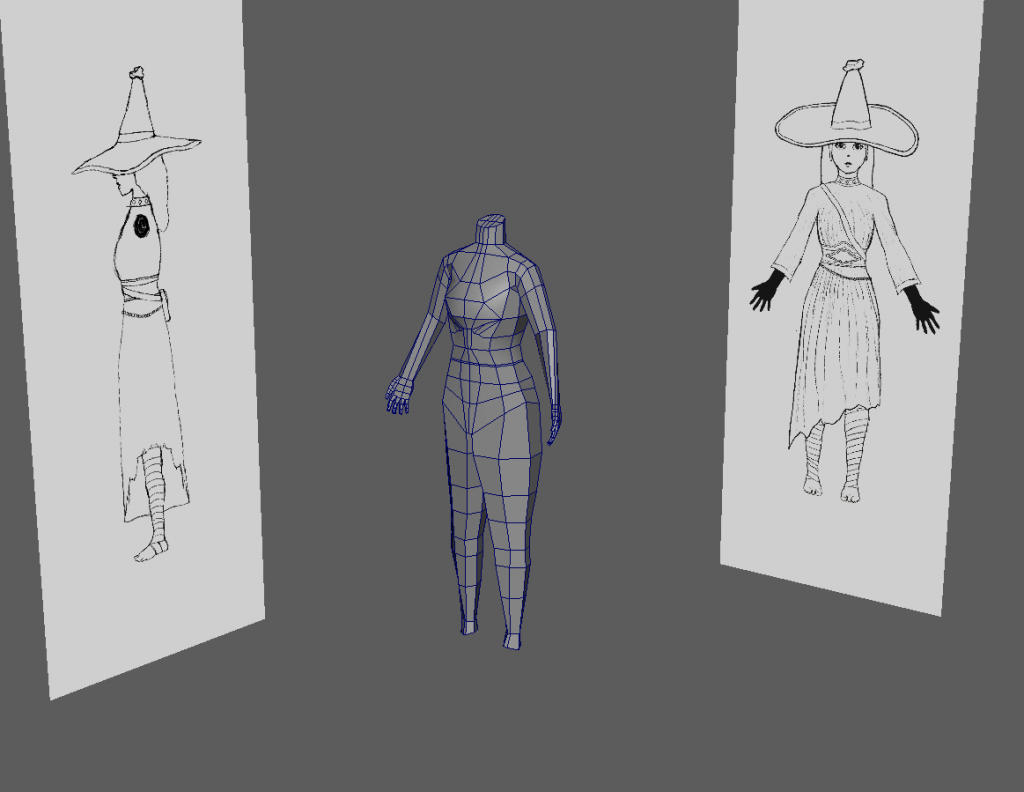
I added hands to the blockout by extruding them outwards.
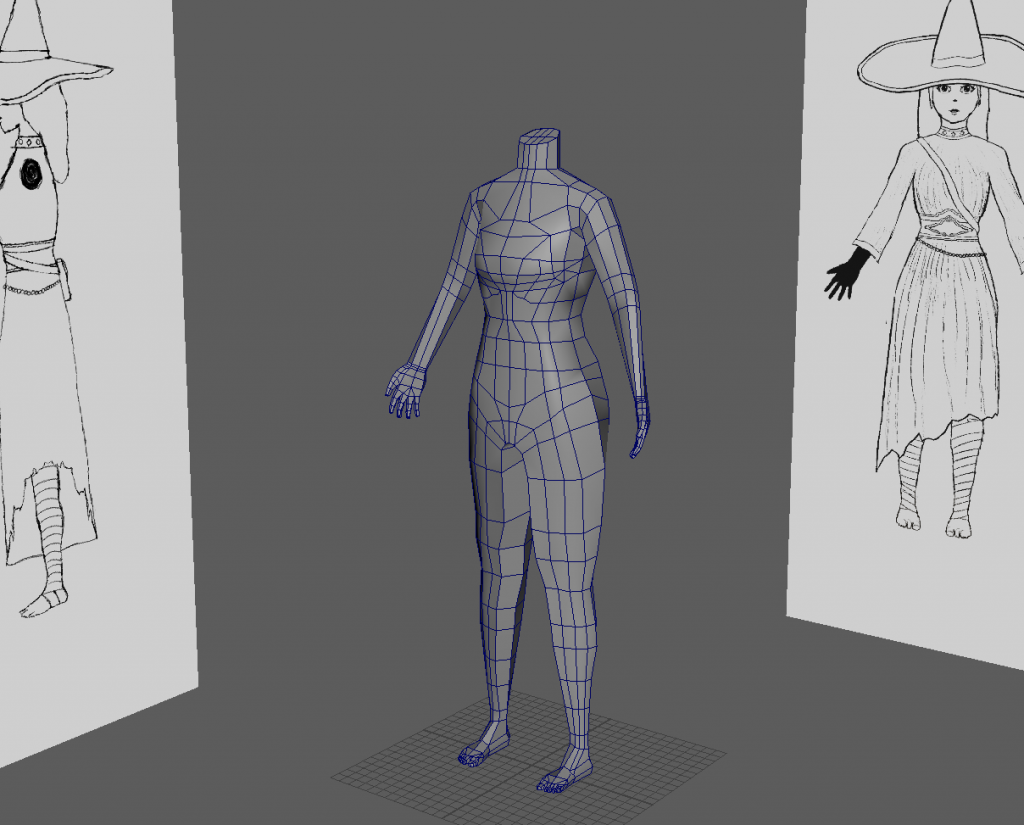
Then I added subdivisions and shaped the body slightly.
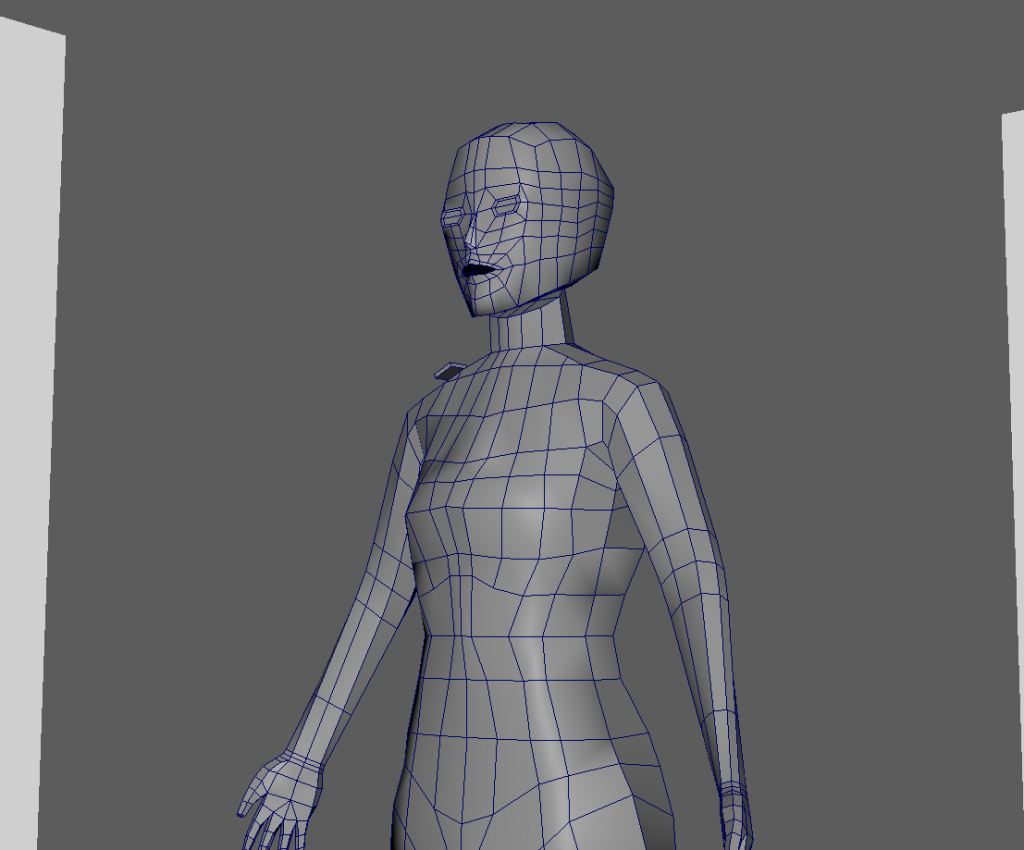
To make the head I used a cube and roughly shaped it to a head shape using the subdivision tool. Then I used the multi-cut tool to add loops, and used the extra vertices to shape the head further.
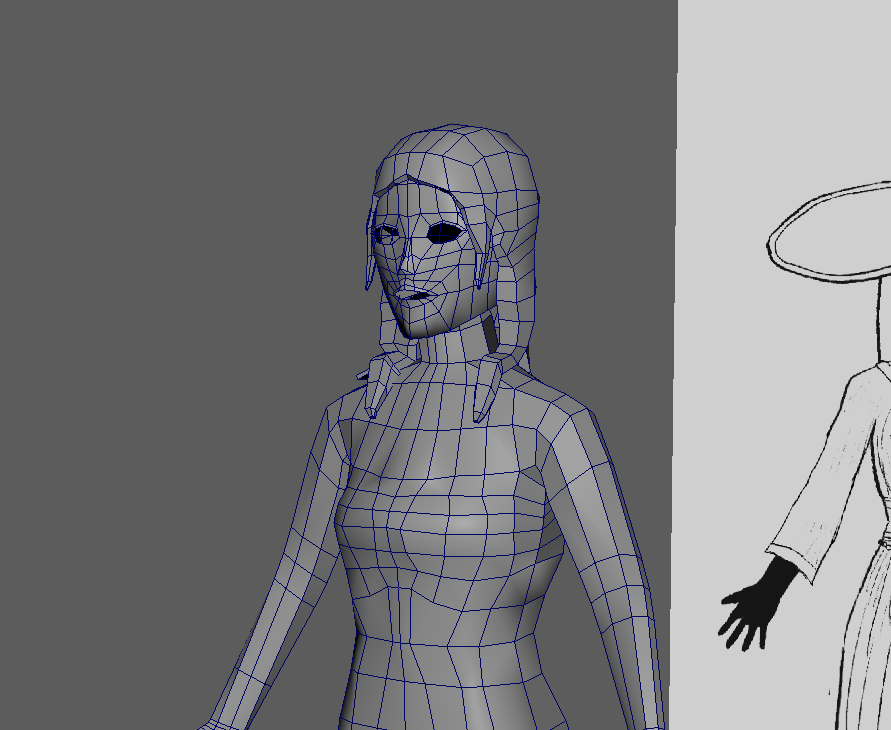
Moving onto the hair, I duplicated the skull, extruded to give it thickness, and then extruded specific faces to create the length.
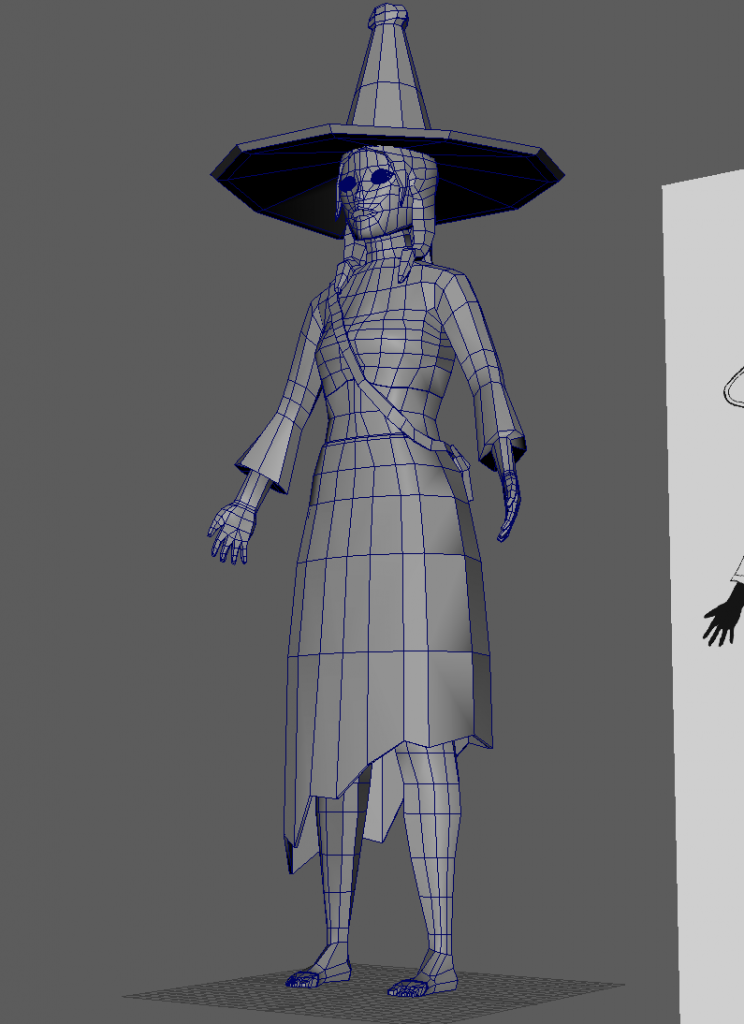
After I was happy with that, I moved onto the accessories. I made the bag by positioning a cube at the shoulder and extruding from the side faces down.
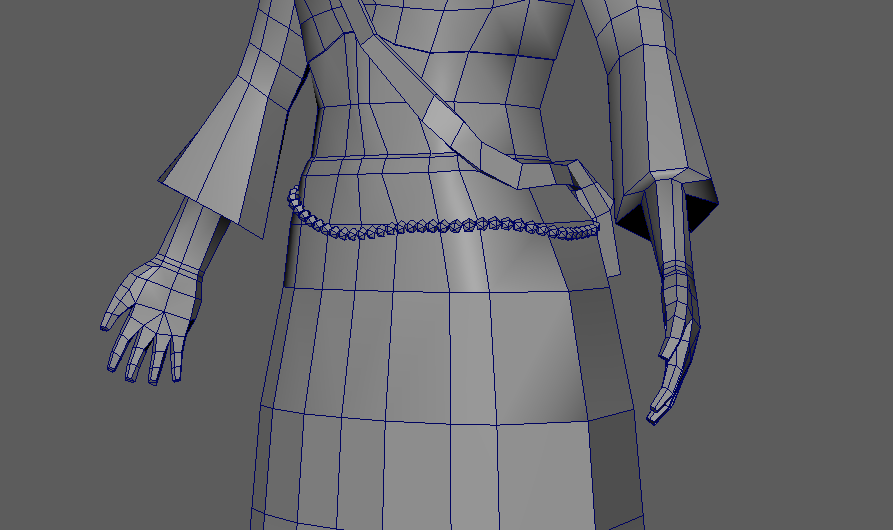
To make the bead belt I reduced the faces of a cube, and then created a MASH generator to duplicate it around a curve. This allowed me to place them exactly on the hips and saved me time from if I were to duplicate individually.
Finalising my model, I found that Zelda models had sharp edges and had visible vertices at some point, meaning that they were not fully smoothed.
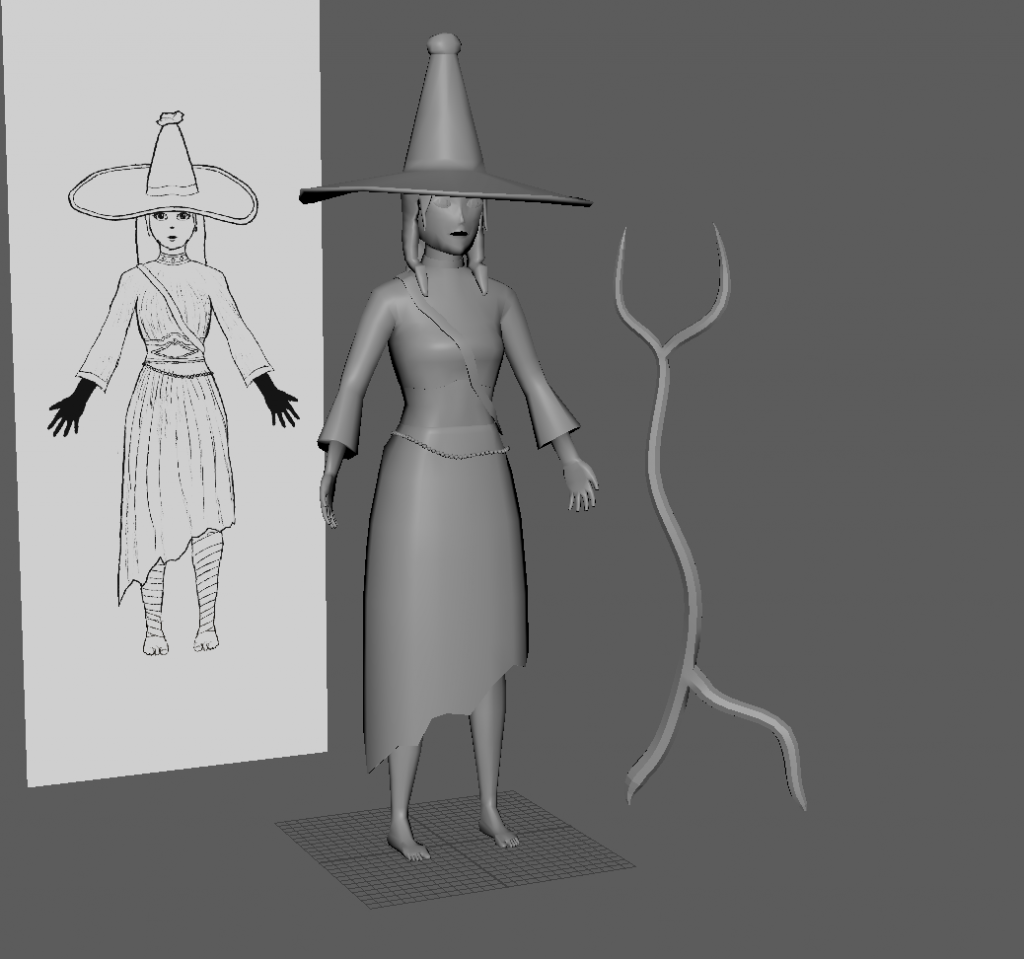
So I decided to simply use the smooth edges option rather than smoothing the entire model. This saved me polys as well, meaning I could do final shaping and cleaning up. I also created her prop, which is a wooden staff that she uses as a walking stick to help her travel across mountainous desert dunes. I decided not to create the face veil, as this meant I would be crunching time. In the future, I definitely want to try adding it to this model.
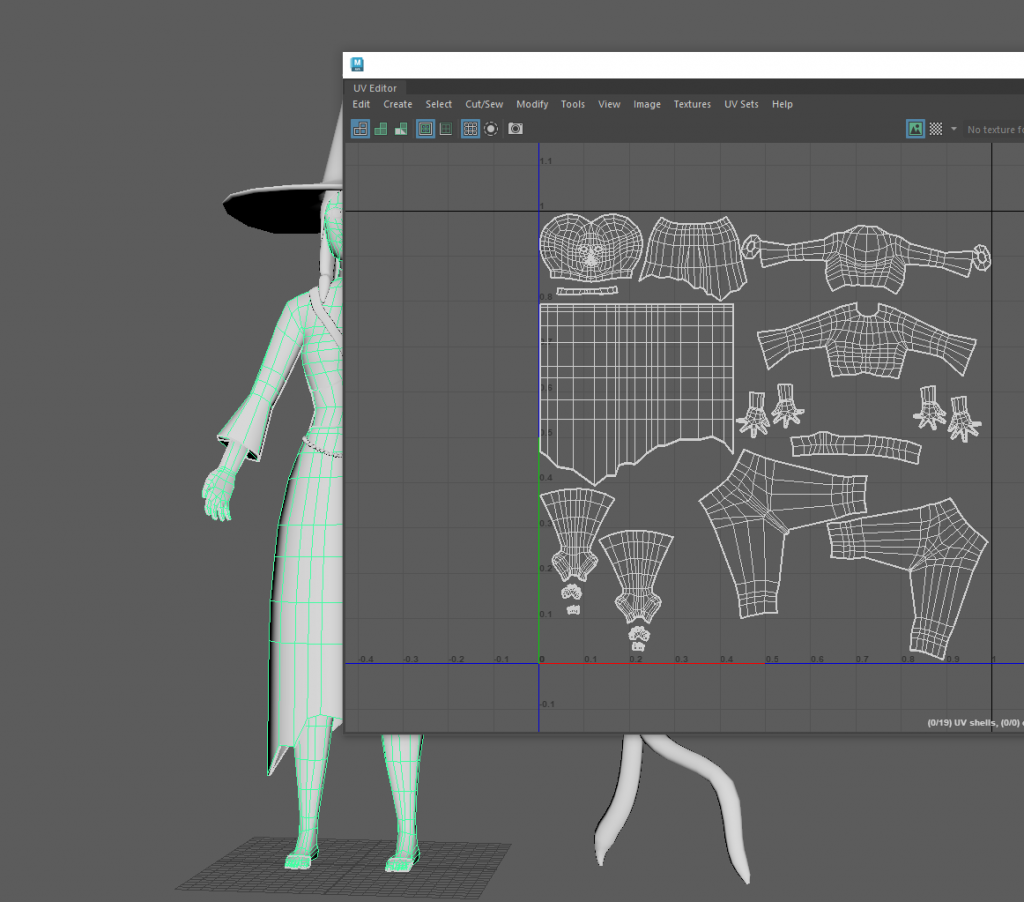
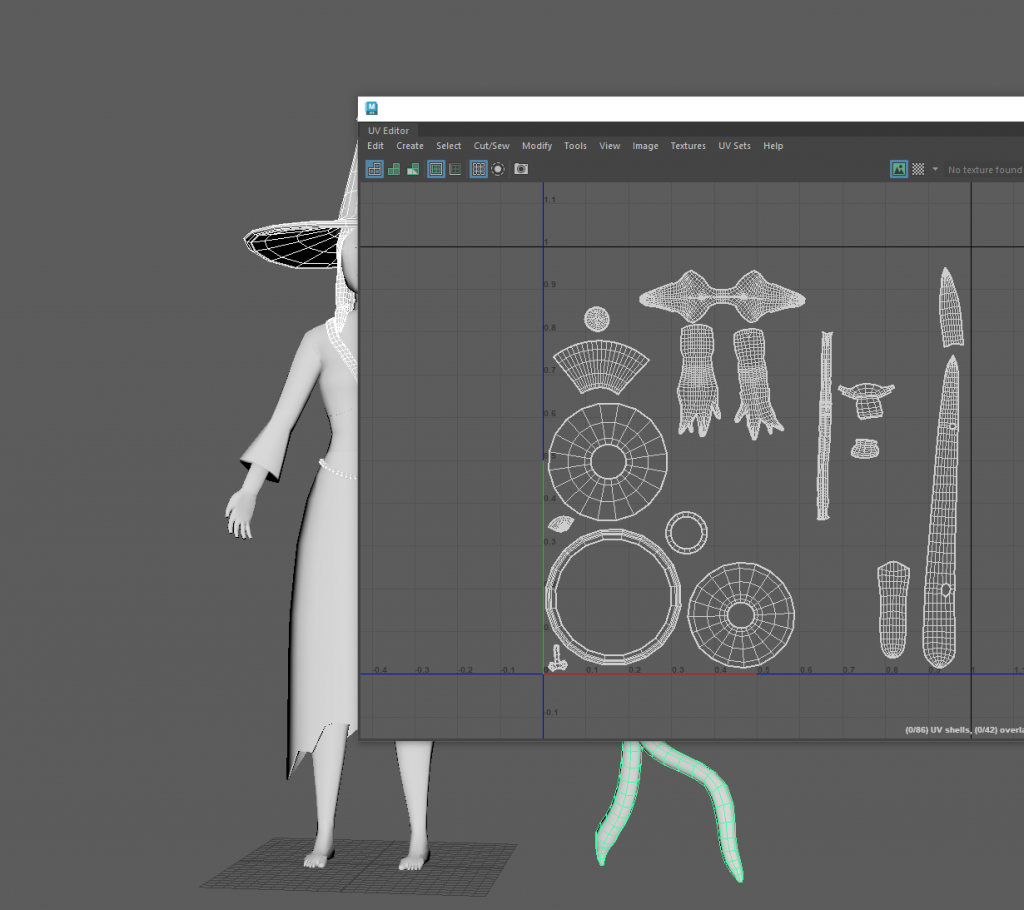
Before moving onto texturing or rigging, a model must be UV unwrapped. Limited to two texture maps, I separated the body from the accessories. I unwrapped the body and decreased the texel density for parts that would not be visible at all, such as the inner skirt.
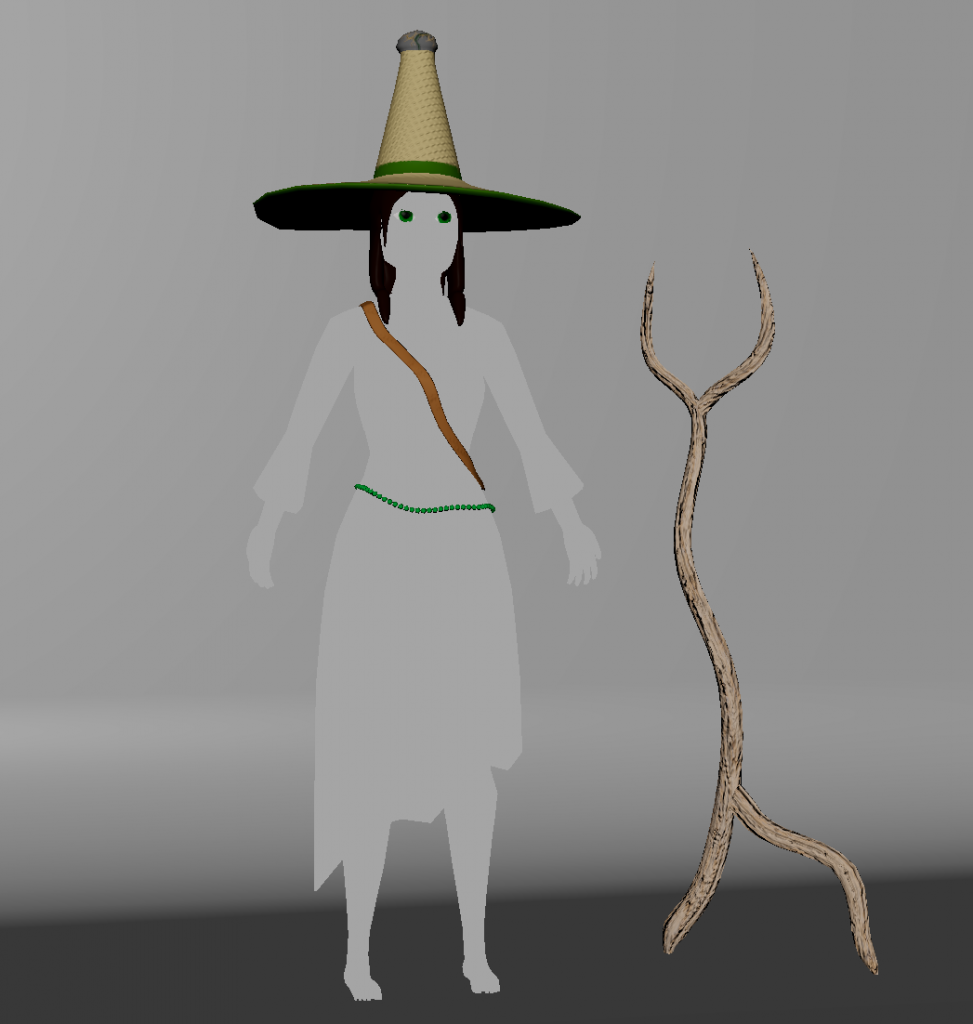
In Substance Painter I started texturing. These were the textures for the accessories imported into Maya. In Substance, I made the lighting completely blank white so I could ensure that I wasn’t getting any colour distortion.
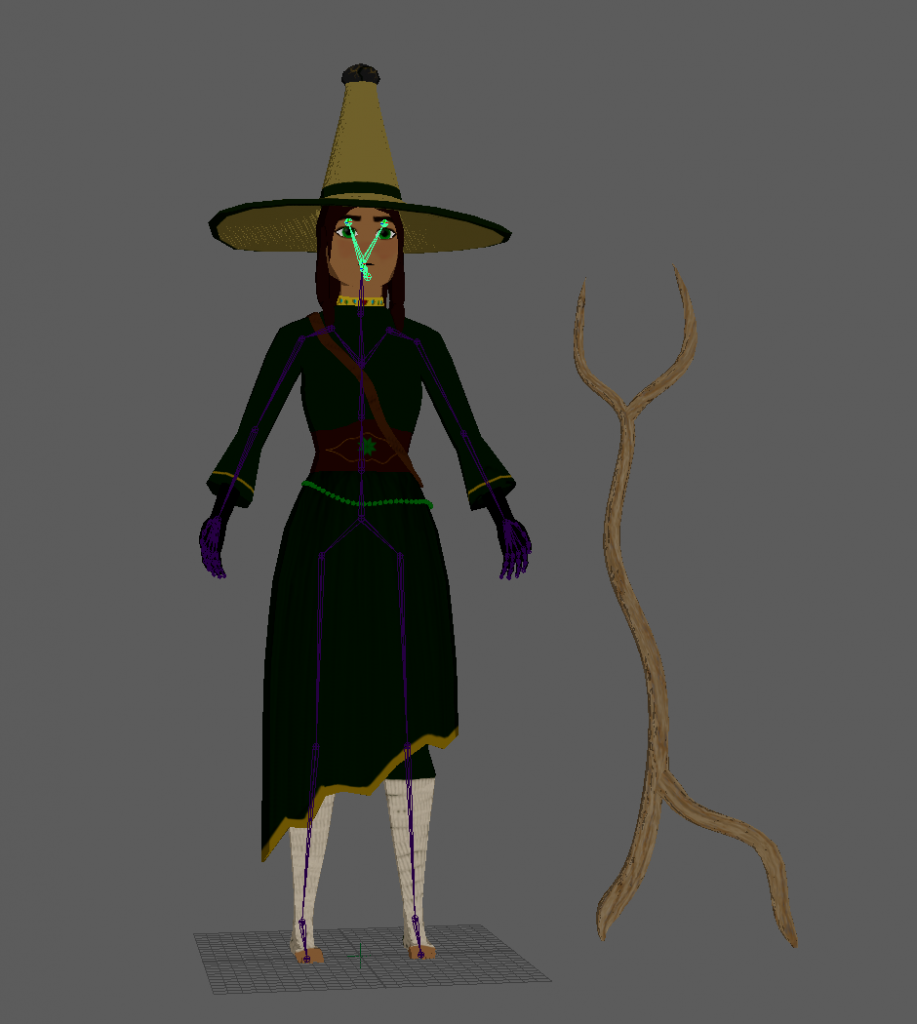
I finished the textures and imported them into Maya. The last step was to rig and animate the model, so I created a skeleton.
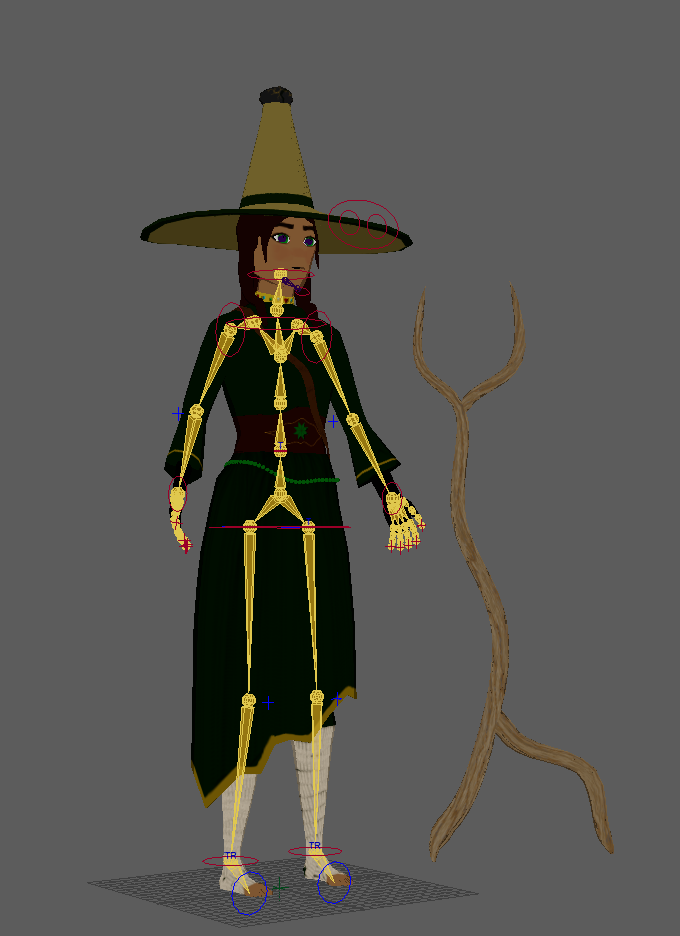
After ensuring the position of every join was correct, I created a control rig.
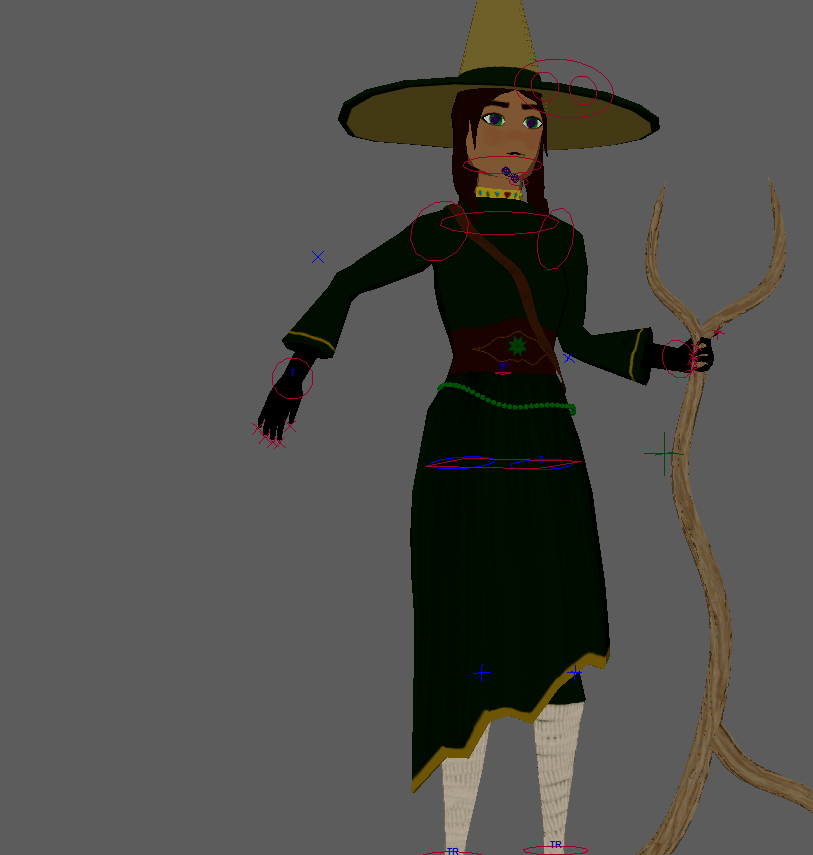
When creating a control rig, it is highly likely that the weight of effect each joint has on the model will be messed up. For example, if I were to pull the wrist away, my model would pull hip faces with it. To combat this, I utilised the weight painting tool, which allows you to determine what faces each joint has an effect on. I would pull a joint to an extreme and then erase the ‘paint’ from all the faces I did not want it to have an effect on. After I was done with this, I was ready to animate.
Thinking about animating, I didn’t want my background to be bland, but I also didn’t have very much time to create a detailed environment.
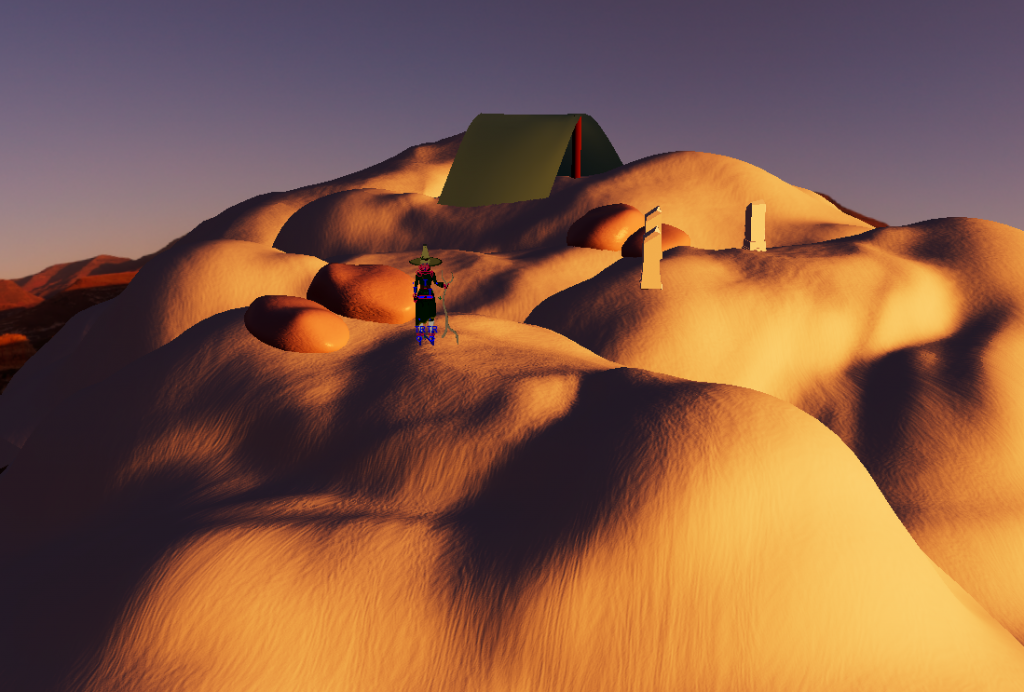
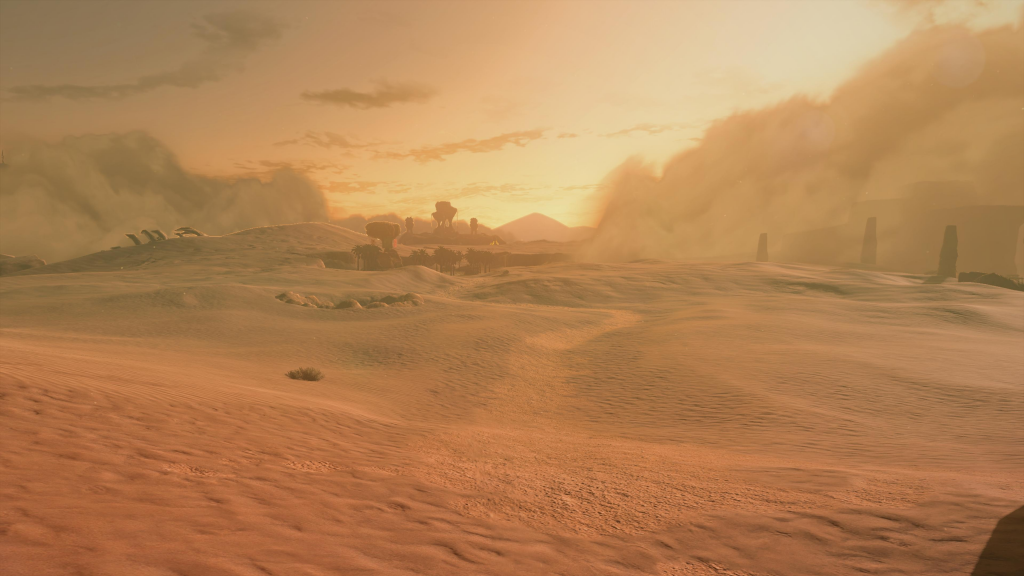
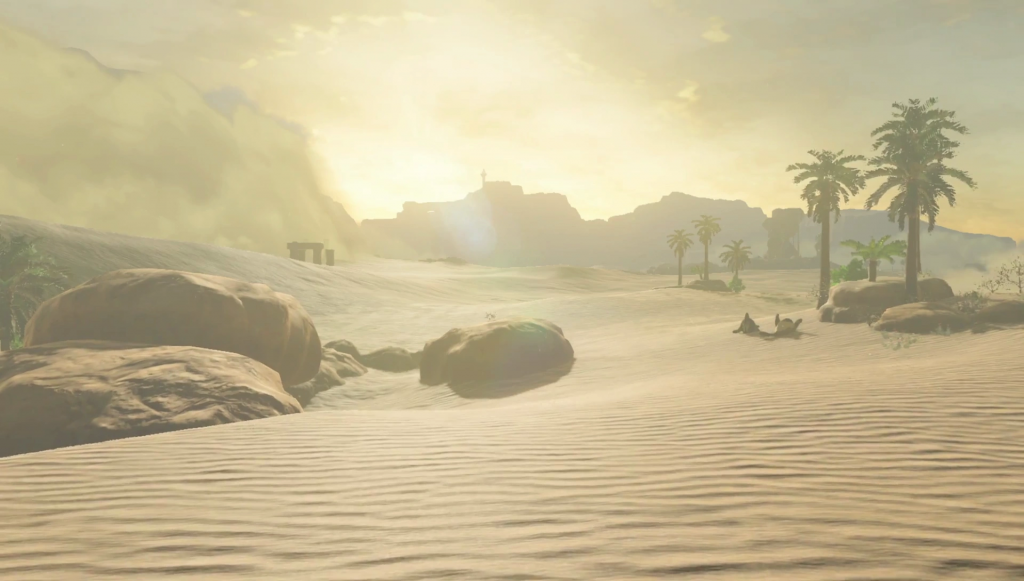
So I tried my best in a short time with Maya’s tools only. I made simple dunes by sculpting a plain and giving it a noise generator and orange colour. I made rocks from smoothed and extruded cubes, and some sand ruins from a cube extruded upwards. I also made a green tent using an ncloth simulation and put it on a wooden shaft, which was just a brown cylinder. I also added a desert HDRI map for the sky.
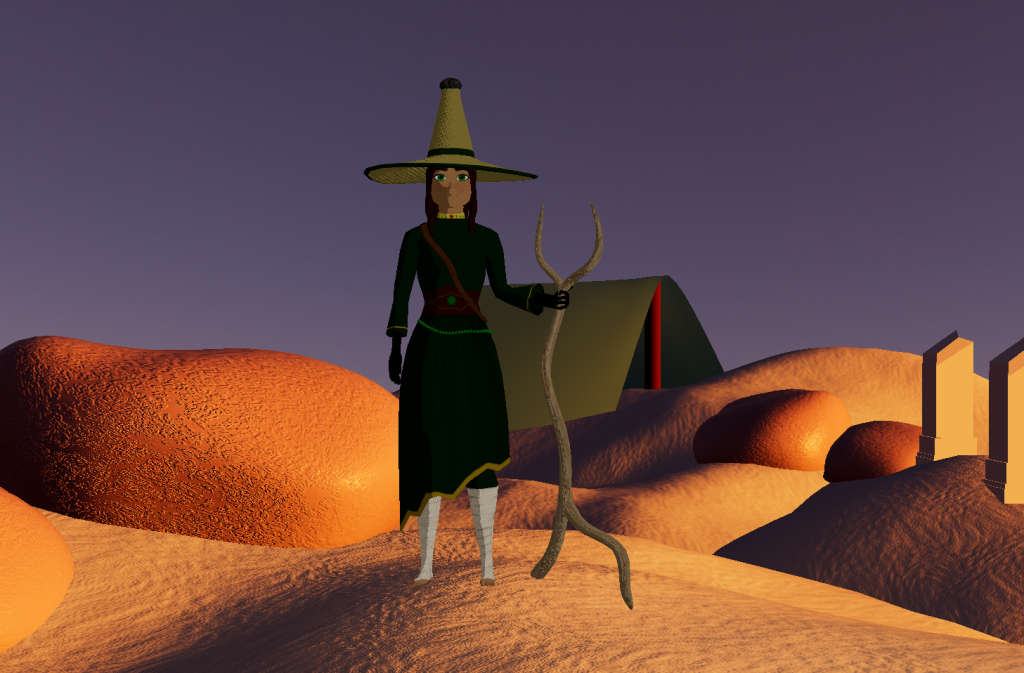
This was the final angle I chose. The orange hues gave the scene a nice sunset vibe, and really solidified the harmony of the entire piece, contrasing the green on the character.
This is the final animation. I exported it via playblasting it. I gave her an idle animation, and then an action where she stomps into the ground. This shows her fiestiness and protective nature of the desert that she cares about, ready to fight for it. I am happy with how I completed this unit. While there are many improvements I can and wanted to make, ultimately I think I fulfilled all the planning and the research that went into creating this character.
2D Creature
For the 2D Creatures portion of this module, my groupmates and I decided on an underwater creature theme. Naturally, I was drawn to creating a jellyfish-esque creature, and came up with the concept of an almost omniscient jellyfish-squid amalgamation that corrupts other creatures, thinking it is doing good in the world. It has royal characteristics, presenting itself very elegantly, as if it is above everything else. My groupmates decided to create one character that is like the pet of mine, doing all the dirty work, and another character that is a victim of mine, having been corrupted. From the prompts given, I decided to go with a curious creature smash, that leans into the parasite, elemental and predator motivation factors.
Research
Before starting in ZBrush, I created a moodboard to gauge the vibes of the creature that I want to create and to collect references to use.
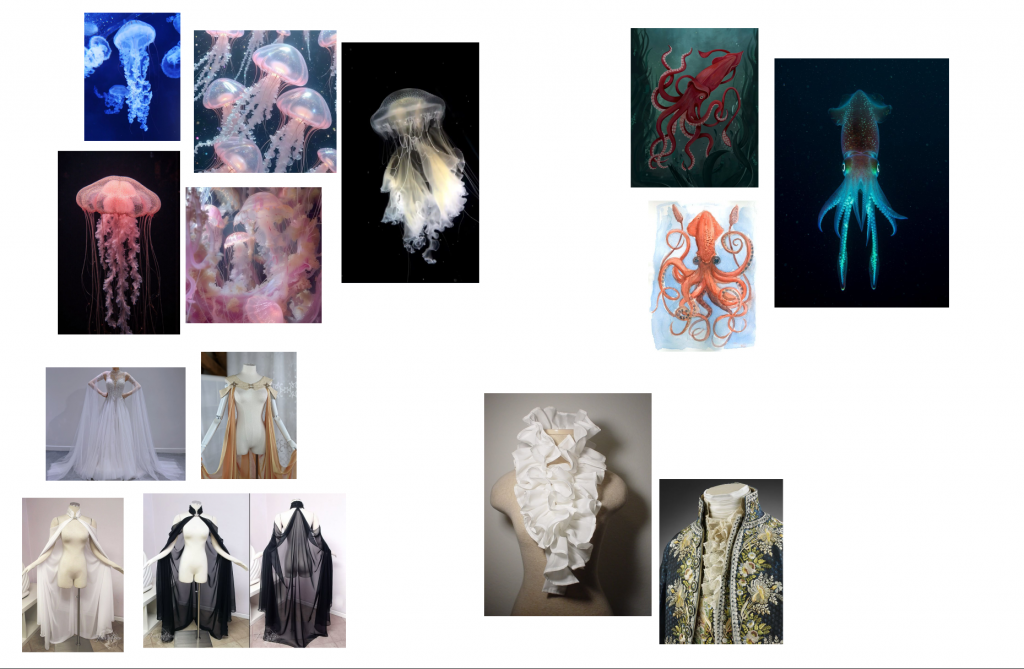

After I was done with my moodboard, I created a sketch of the character so that I am not going into ZBrush blind. I created the body out of tentacles, with two that look like arms that have capes flowing off of them. I then have a frilly collar, reminiscent of royal ruffle collars. The bell, or the head, is that of a jellyfish, with a floating mass in the centre. The bell also has antennae connected to it floating around. There are also four smaller tentacles under the collar, which are mainly for extra detail and impact.
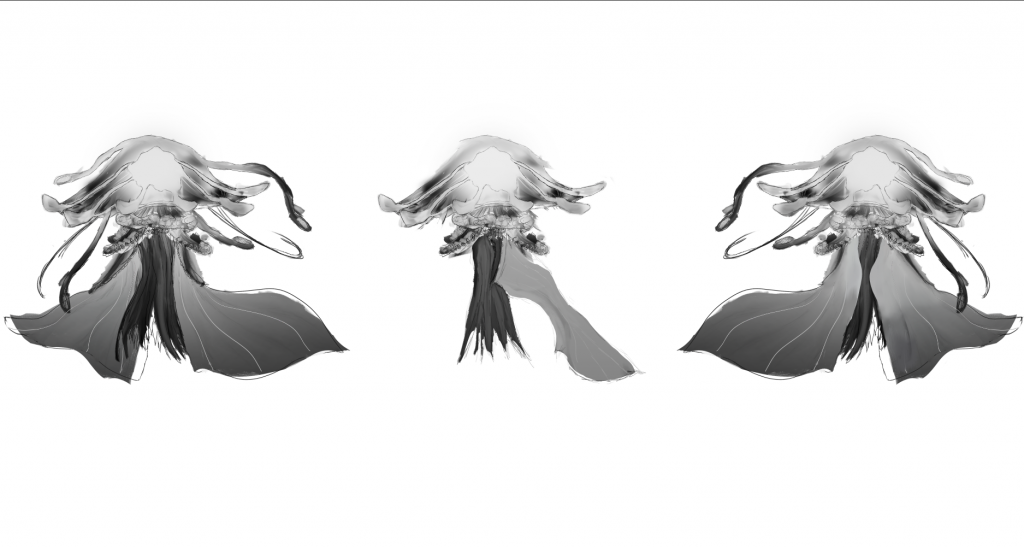
Once I was happy with the design, I created rough orthographic views to use as references in ZBrush.
ZBrush
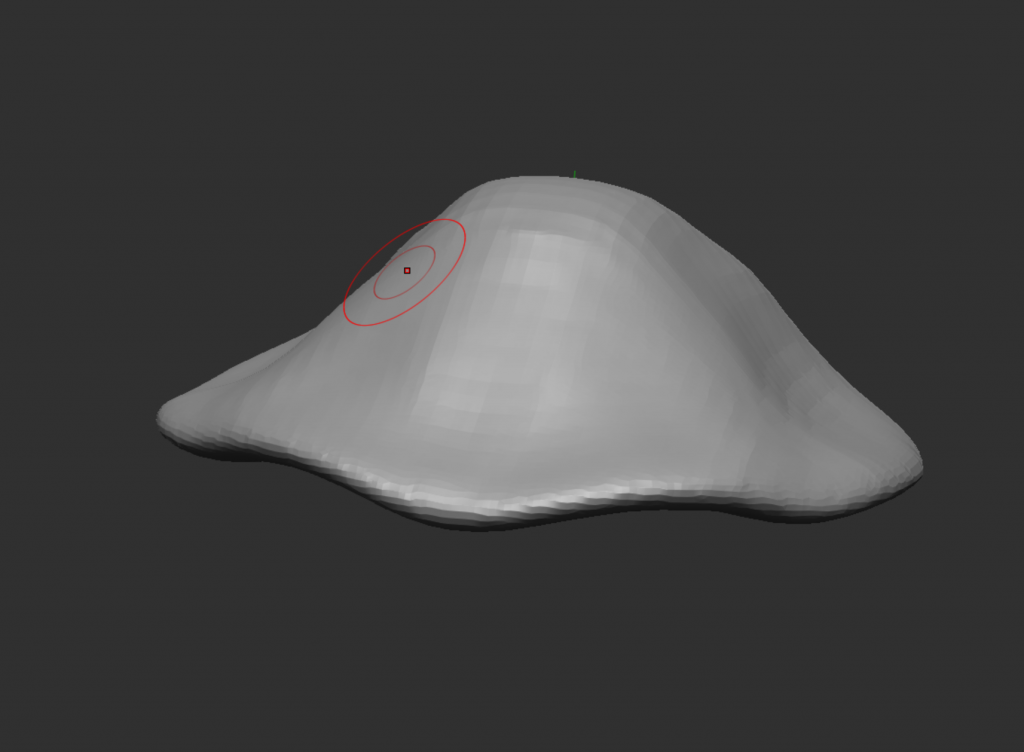
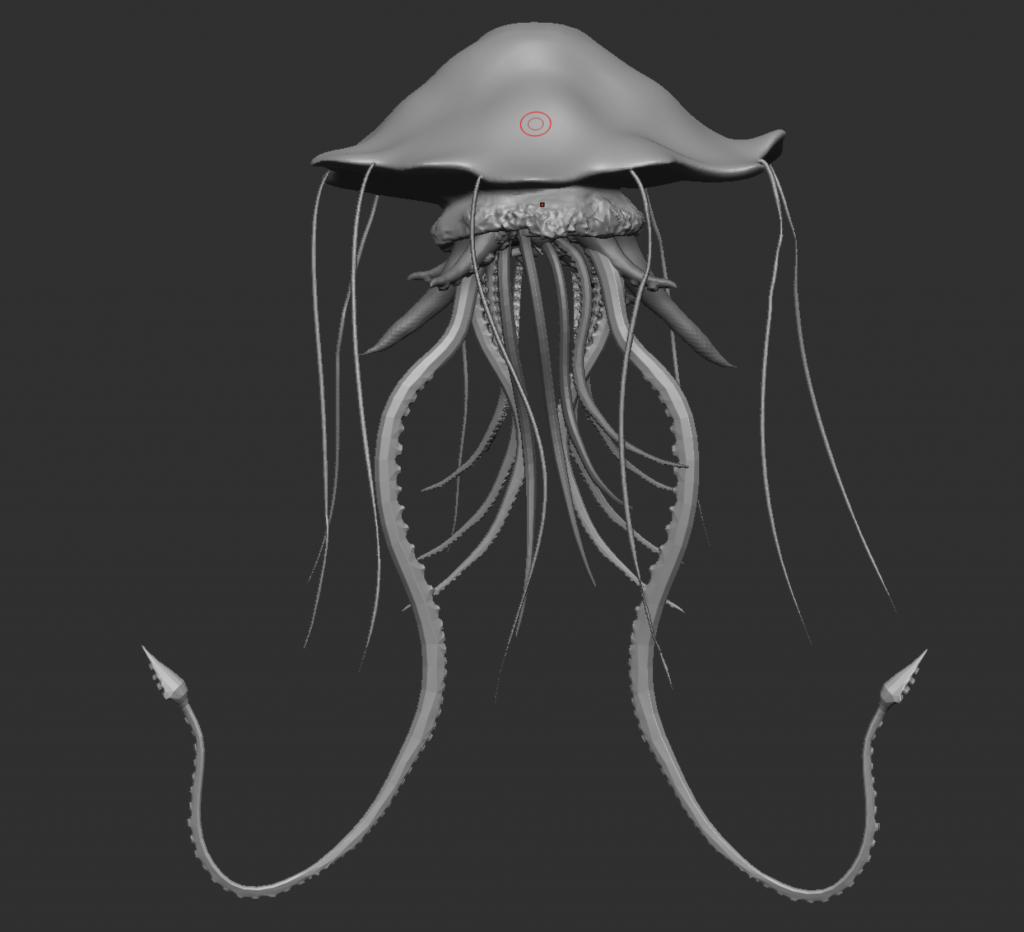
I began in ZBrush with a dynasphere and sculpted it using the move and smooth brushes to make a rough jellyfish shape.
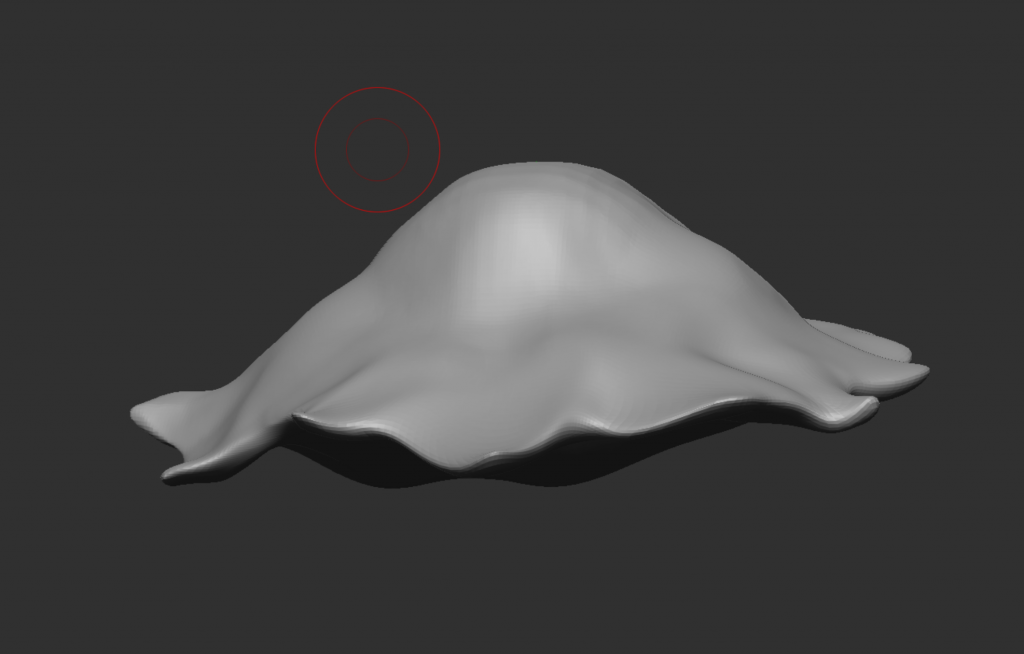
I want my creature to be really exaggerated and elegant, so I’m pulling out the edges and making them flow, keeping the fact that this is supposed to be jellyfish membrane floating in water. To make the process easier, I’m also sculpting it roughly in the same position as how I am going to pose it, so making it like this will save me work in the future.
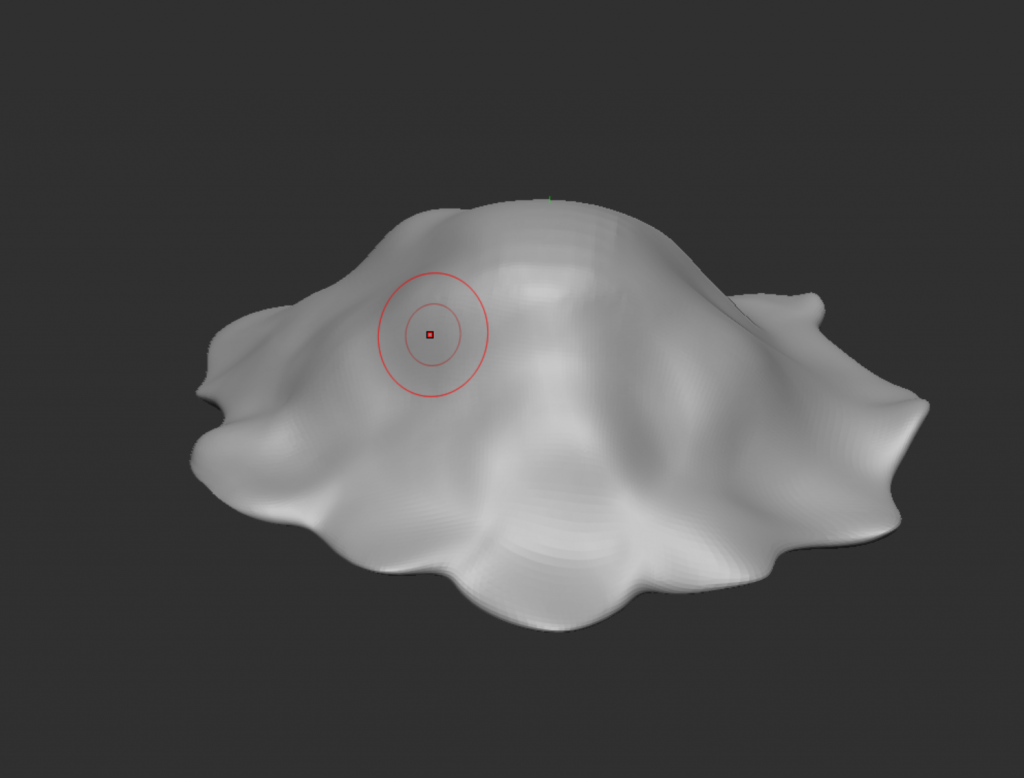
Here I cleaned up the edges and made the creature shaped better overall, also trying to keep the ruffles on the edge fairly even.
After I was happy with how the head looked, I wanted to tackle the tentacles. I tried to create one roughly with the ZSphere subtool, but after doing it a few times and sculpting each one, I still was not happy with how it looked.
Instead of hitting a roadblock in production, I decided to leave the tentacles for later and sculpt other parts of the creature first. Looking at references online, I saw that jellyfish tentacles extend from the outside of the bell, not the inside, so I did this using the curve tube brush. In my drawing I have a ruffle-like texture meant to mimic ruffle collars at the neck of the jellyfish. To create them, I used the clay build up brush to create this extension on the bottom of the bell.
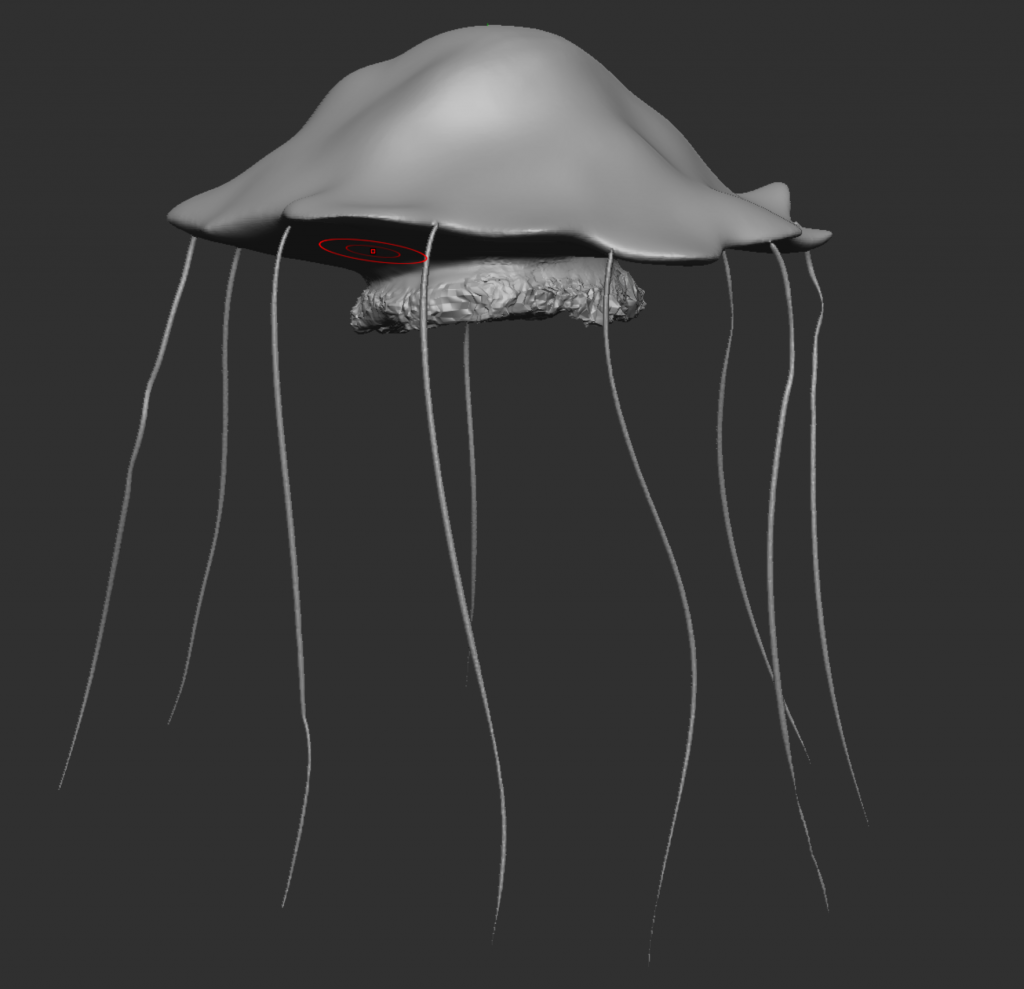
Then, to create the texture, I used the noise brush to create some random bumps and imitate the texture. I will develop this later, but for now I am leaving it like this and working on the rest of the blockout.
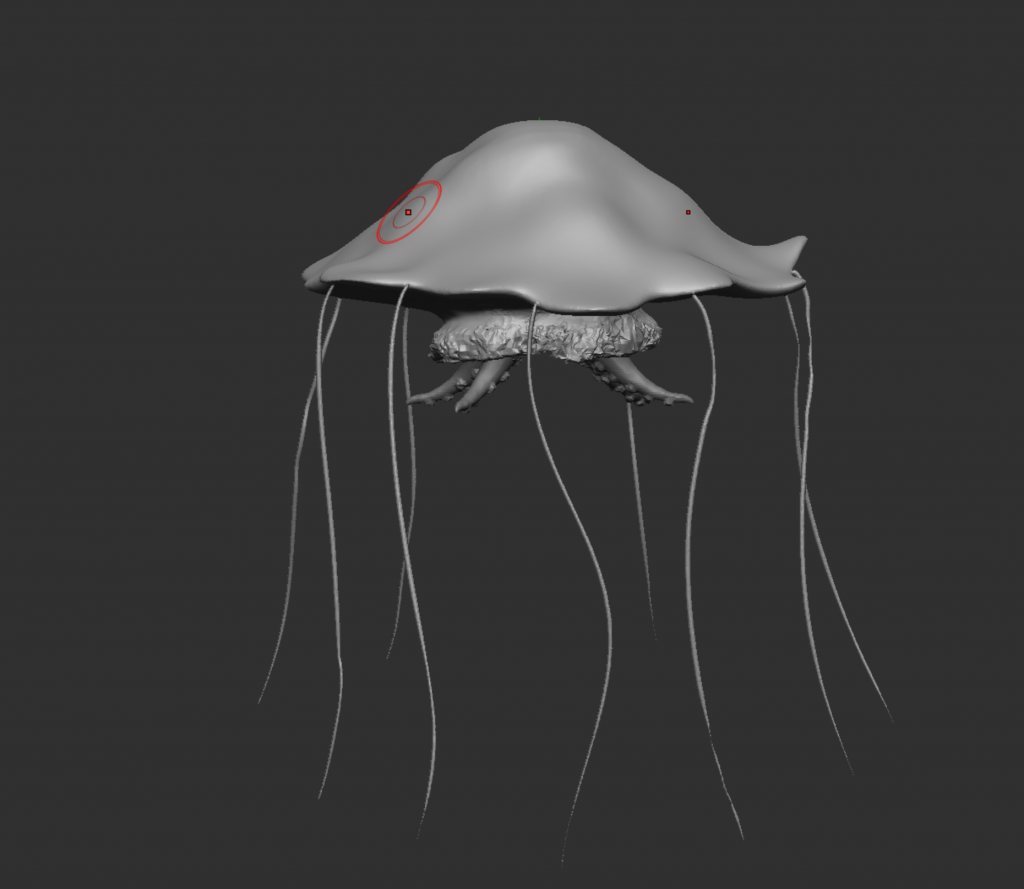
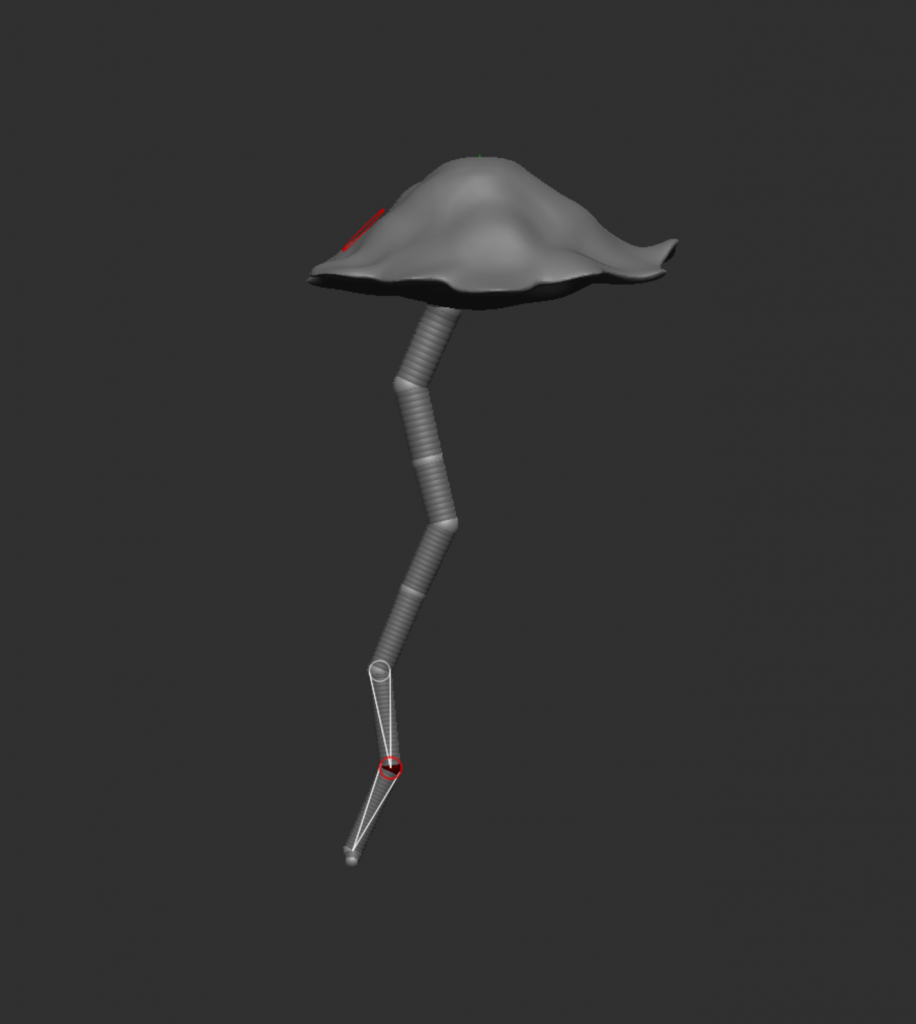
I started on the tentacles. I decided these tentacles extending from the middle of the bell will be squid tentacles, so I made one by using the curve alpha tool and sculpting it to be short as shown in the reference, and then using an octopus tentacles brush I found online I added suckers onto the bottom. Then I duplicated it three times and placed it around in a circle.
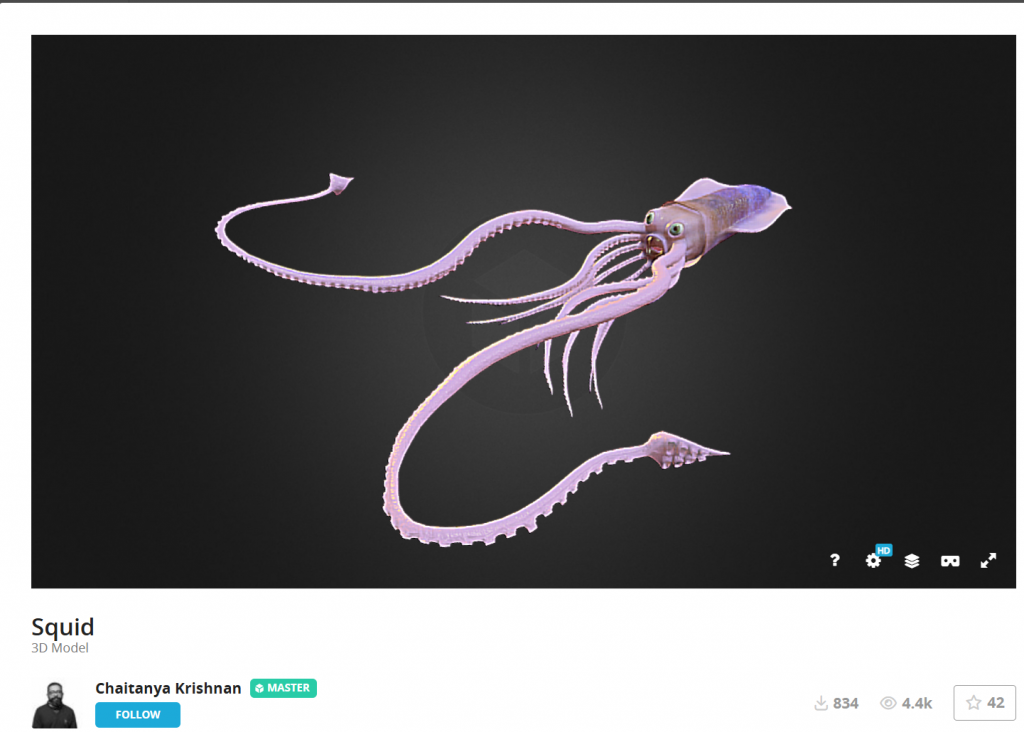
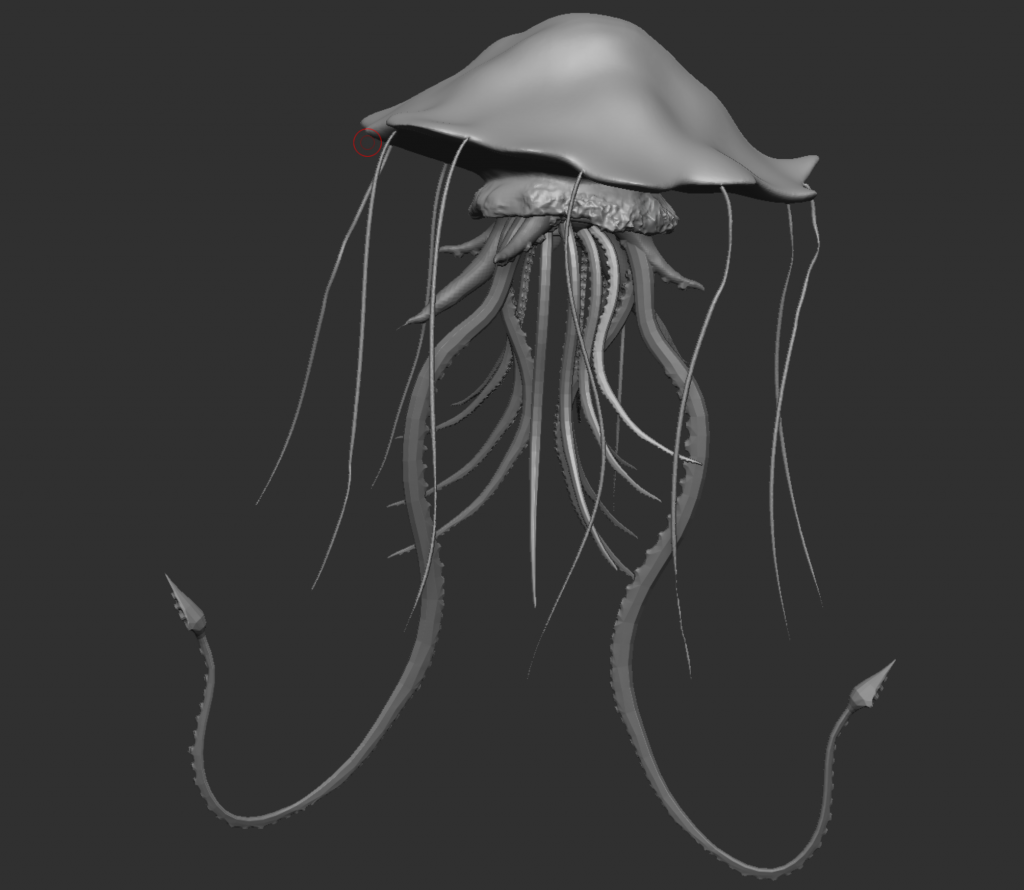
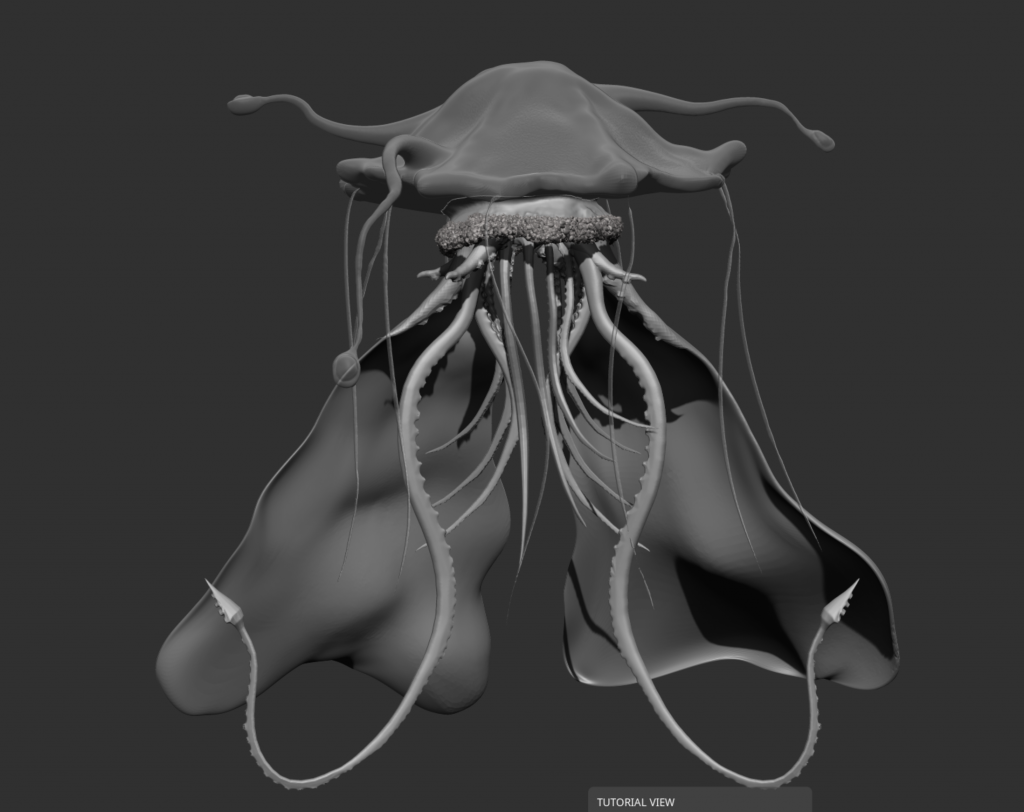
Moving onto the main tentacles that form a body like shape, I couldn’t figure out how to made them how I envisioned, so I searched for a model online that I could use, and eventually came on a squid model on Sketchfab that I really liked, so I took the tentacles and added them to the middle of the bell to create this. I also duplicated some of the tentacles so that the front was covered and some form of a circle was created around the mouth that is in the middle on the underside of the bell. I also added two medium length arms that the capes are going to extend out of.
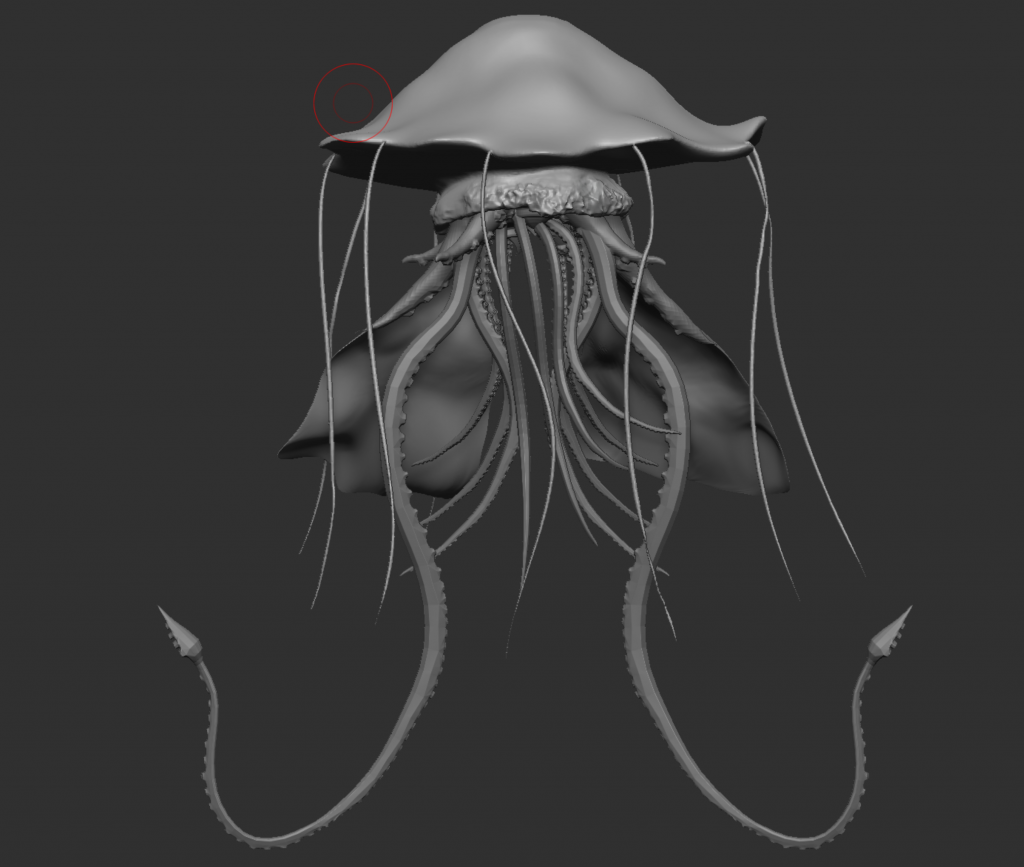
As I have added the arms, I then worked on the capes. I created a cube and flattened it, then sculpted it using all of the cloth brushes and the move brush to make a cape on one arm, and then I mirrored it to the other side. Using the same tools, I adjusted it to make it slightly different while keeping the effect that it is floating in water.
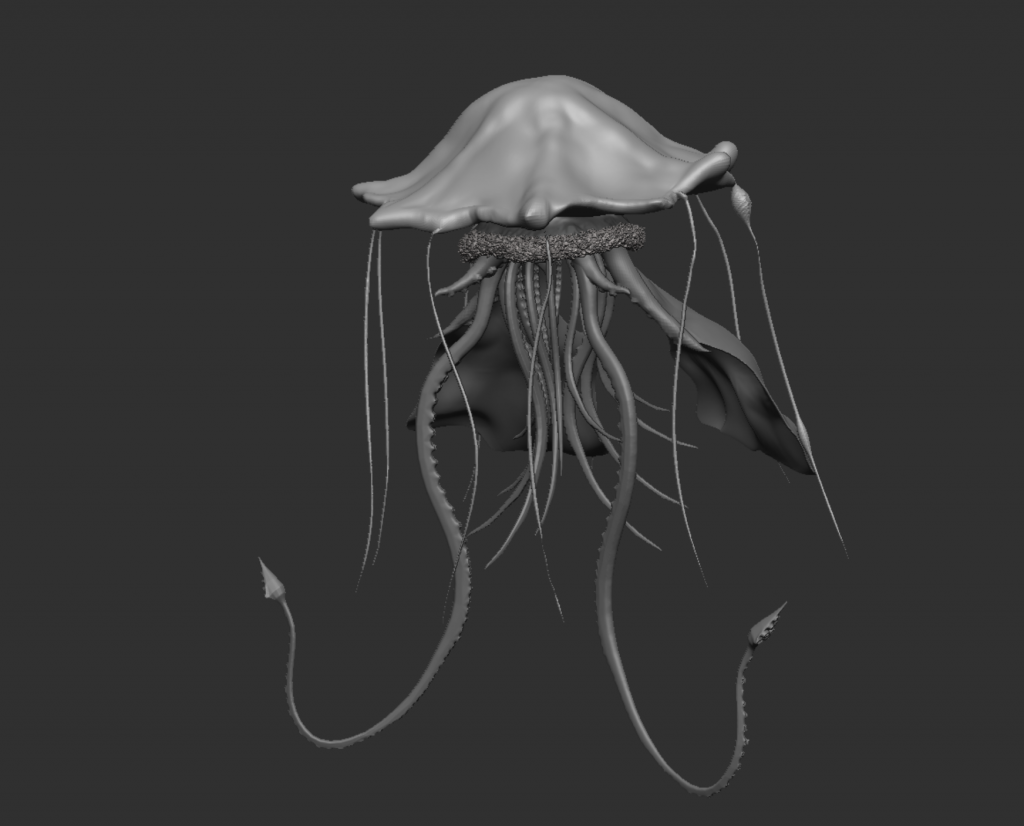
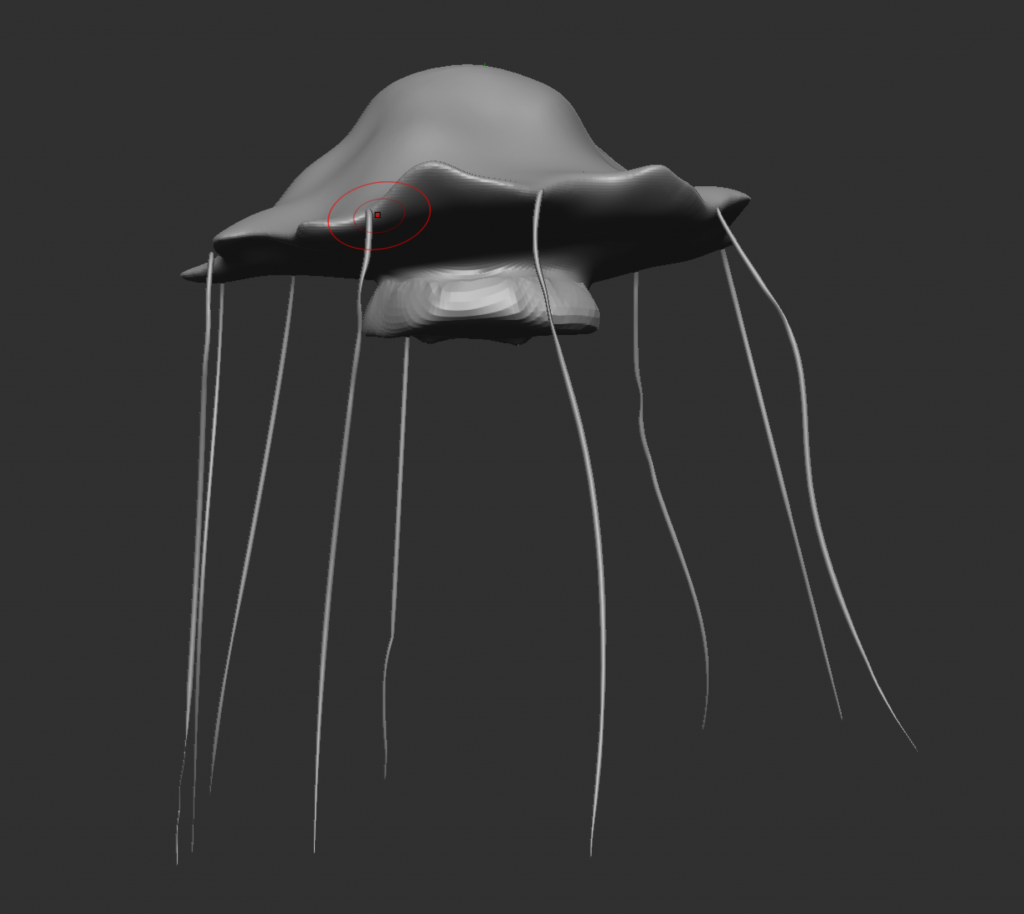
Now that I have every element of the jellyfish blocked out, I am now working on detailing. I started on the bell, or the head. As shown in the reference, I want there to be a glowing mass in the centre that extends out into the edges of the bell, so I added some definition here using the inflat and smooth brushes. I also used the same brushes and the blob brush to add a border around the edges. I also added fibres to the collar to emphasise the ruffled/textured surface.
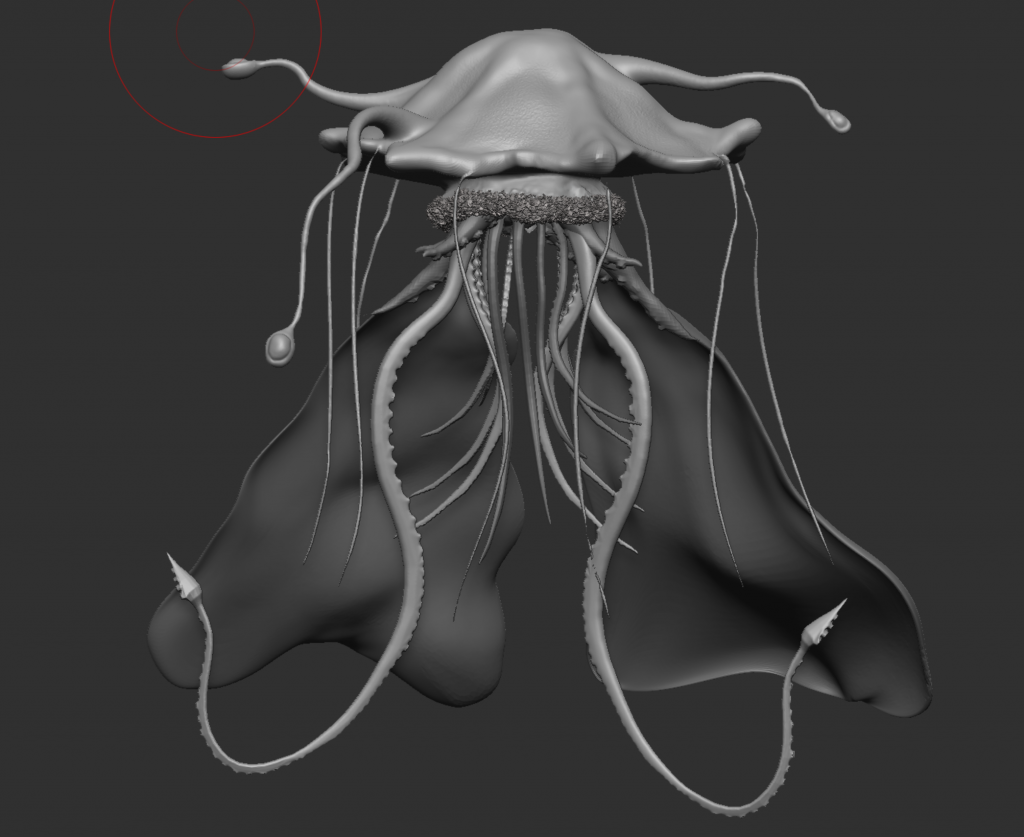
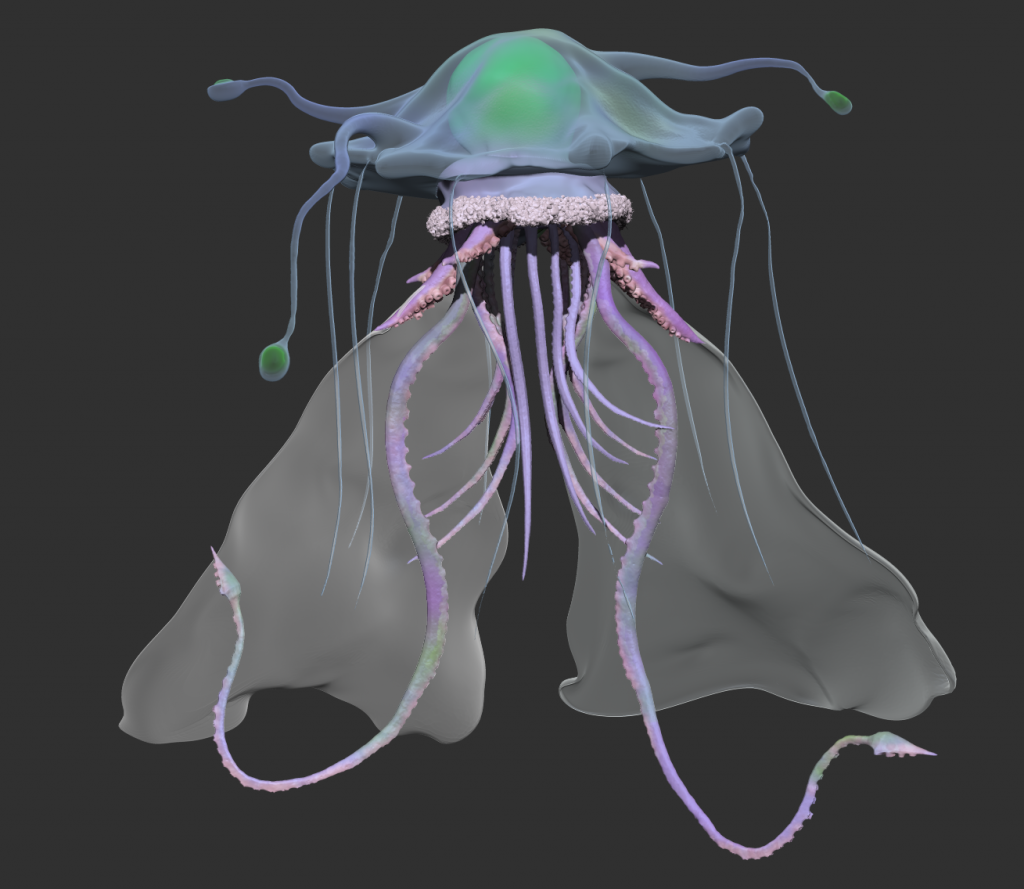
In my reference, I have antennae extending off the top of the head, so I created these using the snake hook brush, and then using the inflat, blob, and damStandard brushes to create the sections at the end. These round shapes will be glowing a colour that will also be featured on my group mates’ creatures to create a connection and show how mine has infected theirs. After getting feedback, I elongated the capes and added more emphasis to them to increase the elegant and royal characteristics of the creature.
Since the bell is influenced by jellyfish, I wanted the material to be membrane, so I used the BPR properties to make it render transparently. Inside the bell, I am going to create a glowing mass that is going to be the source of the jellyfish’s power, like a brain.
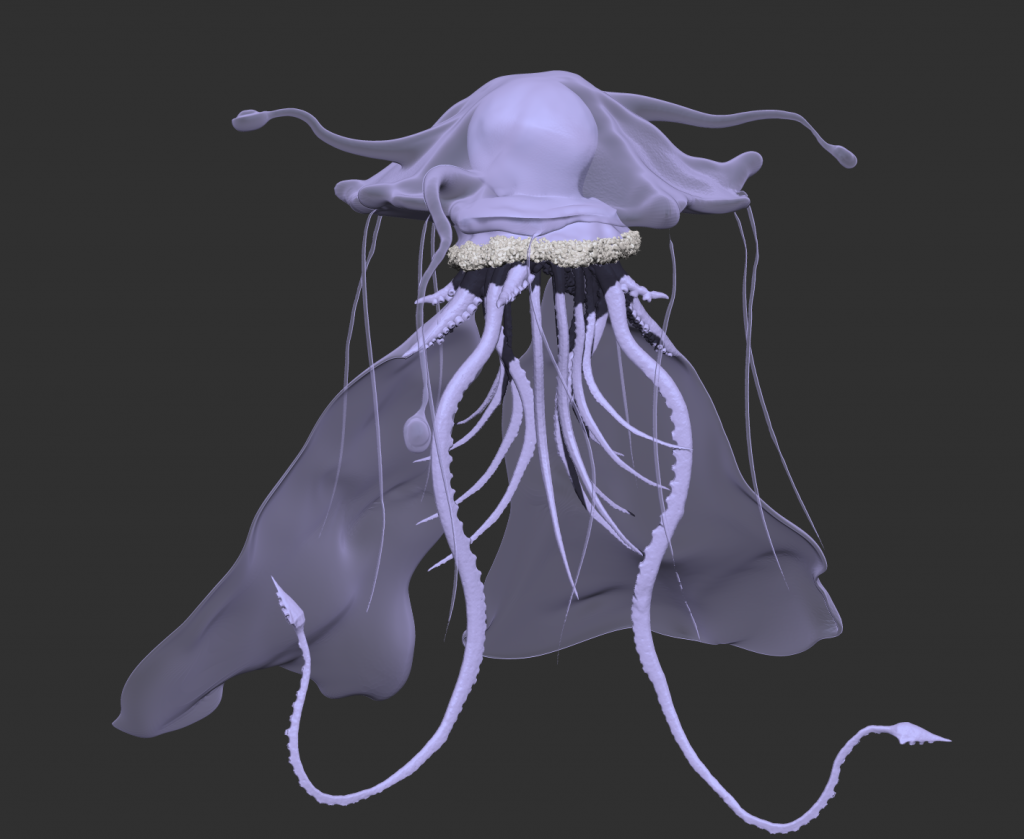
I created the mass inside the membrane using the clay build up tool. I then positioned and tweaked everything, mainly the two front tentacles. Because I sculpted almost everything where I intended for them to be, I did not have to tweak much. I then began the texturing process by applying a lavender colour to the entire model.
I used a lower RGB intensity and different colours to add more variation to everything, making it look more natural. I also added a satin material to the capes.
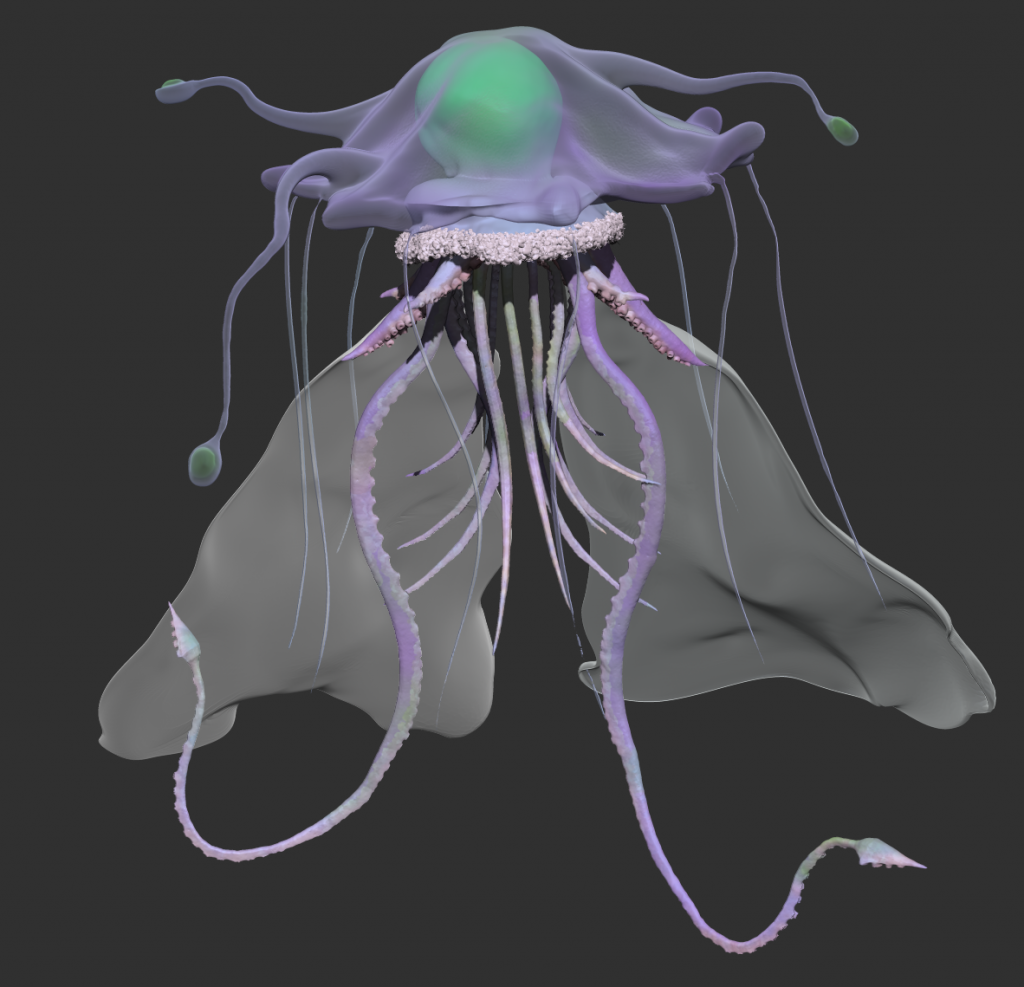
After tweaking the colours further and making the head more purple to match the tentacles as I did not like the blue, I was ready to light and render.
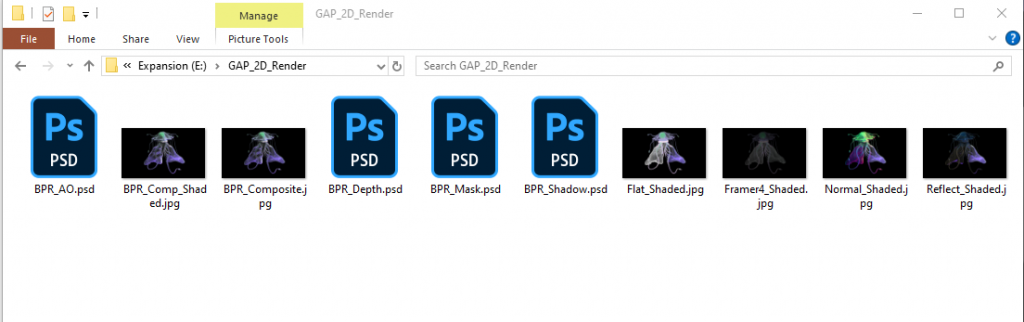
These were all the renders I exported, I will combine and use these in Photoshop.

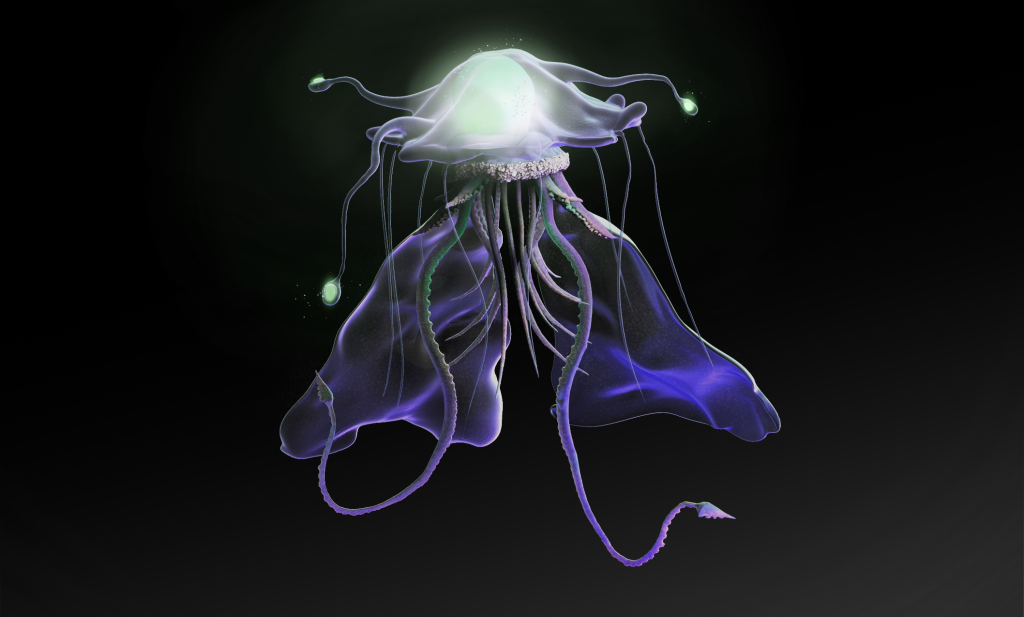
This is the composite render. I had 4 lights, a main one, a green rim light, a purple bottom light, and a light to make the shadows more intense. I made the background black as well to make the colours stand out more. It is also reflective of how dark the ocean is at extreme depths, which is where this creature would reside. My groupmates have chosen blue/purple colours for their creatures as well to link back to mine.
From ZBrush, I exported many renders in different materials, such as sketcher, chrome, flat colour, reflective, depth and more. I compiled all of these in Photoshop and used black masks and blending layers to add elements of each one that made the jellyfish feel more realistic. I then used a soft brush and add layers to make the green masses glow, and a glitter texture onto the capes to add some variety and shimmer.
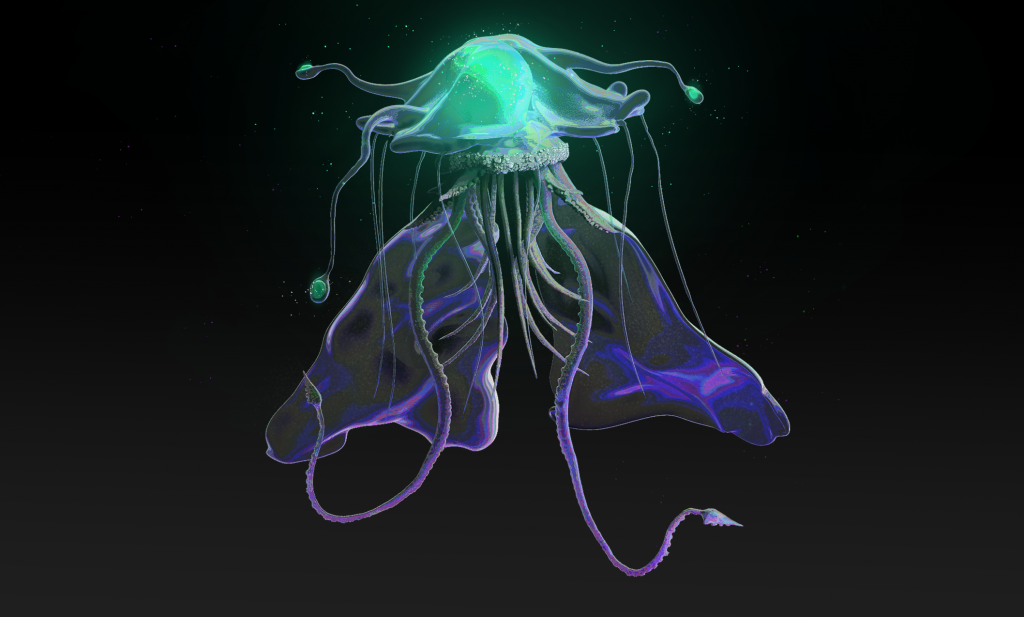
I asked my groupmates for feedback, and one offered to help experiment with colours. Eventually, she used a tonemap and a hard light blending mode on the layer to get this result. With extra sparkles and a more saturated teal glow, I think this was the final step to solidify everything and really make this feel like an art piece.
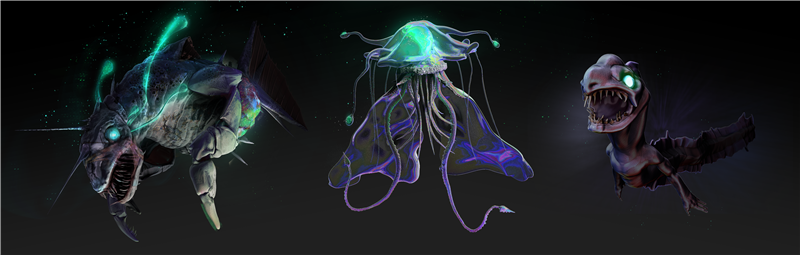
These are all of our final pieces together. I really love the harmony between the colours and quality of each piece. The creatures on each side really feel like corrupted creatures contrasting mine that feels ethereal, linking back to the original concept we created in the beginning. I am extremely happy with my submission for this half of the unit and feel confident in all the skills I have learnt during it.
Reflection
For the 3D unit, while I feel most confident in 3D, I have never explored characters before, and so this felt jumping headfirst into the Mariana Trench. Luckily, I had my peers and lecturers to support me, otherwise I feel I would have really struggled. However, this only drives me to better my skills in character modelling and texturing, and while I did struggle at points, I am confident in the result of my works. My idea to create an environment was very last minute, so if I were to complete this brief again, I would assign more time to creating a more detailed environment to compliment the character. I also think I would do more with the animation aspect, as I feel I didn’t play around with the maximum potential of the rig. In terms of the character topology, I feel that I did well considering this was my first time creating an actual character, but I do think there are a lot of improvements in decision making to be made that can only be acquired through practice. So, to move forward, I intend to keep practicing my 3D skills in character modelling, so I can eventually create flawless models exactly how I envision.
The 2D unit having more creative freedom was a blessing and a curse, but ultimately seeing all three characters on a file together was the most rewarding feeling and captured the point and motivation of art and artists altogether. I began this brief with a vision and tried my hardest to stay true to it throughout. I had to experiment with different ways of achieving what I wanted, such as model bashing instead of creating everything from scratch, in order to keep the vision. Constant feedback from groupmates helped us to stay in sync and kept the harmony between our creatures. I ran into a few problems that were easily overcome during the sculpting stage and put time and effort into achieving the elegant aura of the creature, but more problems arose when I moved into the colouring stage and hit a complete block, hand in hand with problems in real life too that meant I was in a complete life block. I had no idea how to achieve what I wanted to do, had no inspiration, and no confidence in my work. However, I overcame this by prioritising tasks, breaking the problems down and doing lots and lots of research and discussing with my group. I researched transparency in ZBrush, materials, brushes, settings. I assigned what I was going to do in ZBrush, and then what I was going to do in post. This made it all easier and eventually I was able to, with the help of my peers, create my final piece that, in my opinion, fulfilled my vision. Although it was a rocky road and there many changes along the way, I am extremely confident with the final result. If I were to do this brief again, I would try to create the tentacles myself or even change them from being squid tentacles to something else, like an actual body. I would also experiment with different colour schemes, or how it would look with less vibrancy, or more variety with colours.
Overall, both briefs have provided me with many obstacles to overcome and challenges to face. But I faced them, and I beat them, and I have a fully rigged animated character and a finalised character sheet to show for it, both of which reflect the time and effort I put in. Ultimately, I am extremely proud of them, and I have grown skills in many programs and mediums, all of which I can use in the future to create even better art.
Leave a Reply